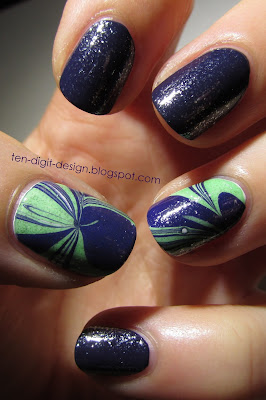
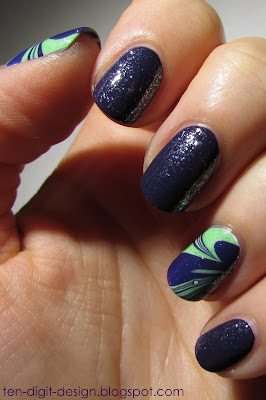
Hello again! I am getting back into the nail art game! I am planning on doing my cousin's nails for her confirmation. I can't wait! Anyway, I did my own nails yesterday. I decided to do some water marbling. The more you try this method, the better you get. Yesterday was my fifth time water marbling.
I started out with a coat of OPI Natural Nail Base Coat. I then painted two coats of Sinful Colors Snow Me White on my ring fingers and thumbs. I planned on water marbling only these fingers. It is best to water marble over a white or a light polish so the water marbling colors will pop. I painted two coats of Essie No More Film on the rest of my nails.
I then took masking tape and applied it all around my nails and about half way up the fingers that I was going to water marble. This significantly reduces the amount of clean up you need to do after water marbling. I suggest using masking tape because it is more flexible and easier to apply all around your nails. It is also easier to remove because it sticks to itself a little less and doesn't peel into small strips, like scotch tape does.
I then started water marbling. I used Essie No More Film and Essie Mojito Madness. These were great polishes to use because the consistency was just right. They spread out across the water very nicely. If a polish is too thick, it will not spread out well. Also, the water I used was a teeny bit warmer than room temperature. Room temperature water is what you are supposed to use while water marbling. The very slightly warmer water worked fine, though.
After dropping alternating drips of these two polishes onto the water, I took a toothpick and dragged it from the outer edge of the polish floating on the water into the center to create a clover shape. I kept doing this until I saw something that I wanted on my nails. Then I dipped the nail into the polish at the point that I wanted on my nails. I left the nail submerged and gently blew onto the surface of the water to dry the excess polish. I then took a toothpick and swirled it through the water to collect the excess polish. After, I removed my finger from the water, removed the tape with small scissors and tweezers, and used acetone to clean up any polish that got onto my skin.
I finished off with a coat of Sally Hansen Diamonds, a fine, iridescent glitter, on all of my nails, and then two coats of Sally Hansen Dries Instantly.


No comments:
Post a Comment