Friday, August 30, 2013

Studs and Stripes

I finally got around to painting my nails again.  College starts for me in a few days so I probably won't have as much time to do my nails then, but I will try to do at least one manicure a week...maybe.  Haha!  Today I felt like using a matte top coat.  Matte polish always reminds me of wax when it is dry:


I haven't been able to get good pictures inside my house, so, again, I went outside to take the pictures.  Luckily, it's been sunny.

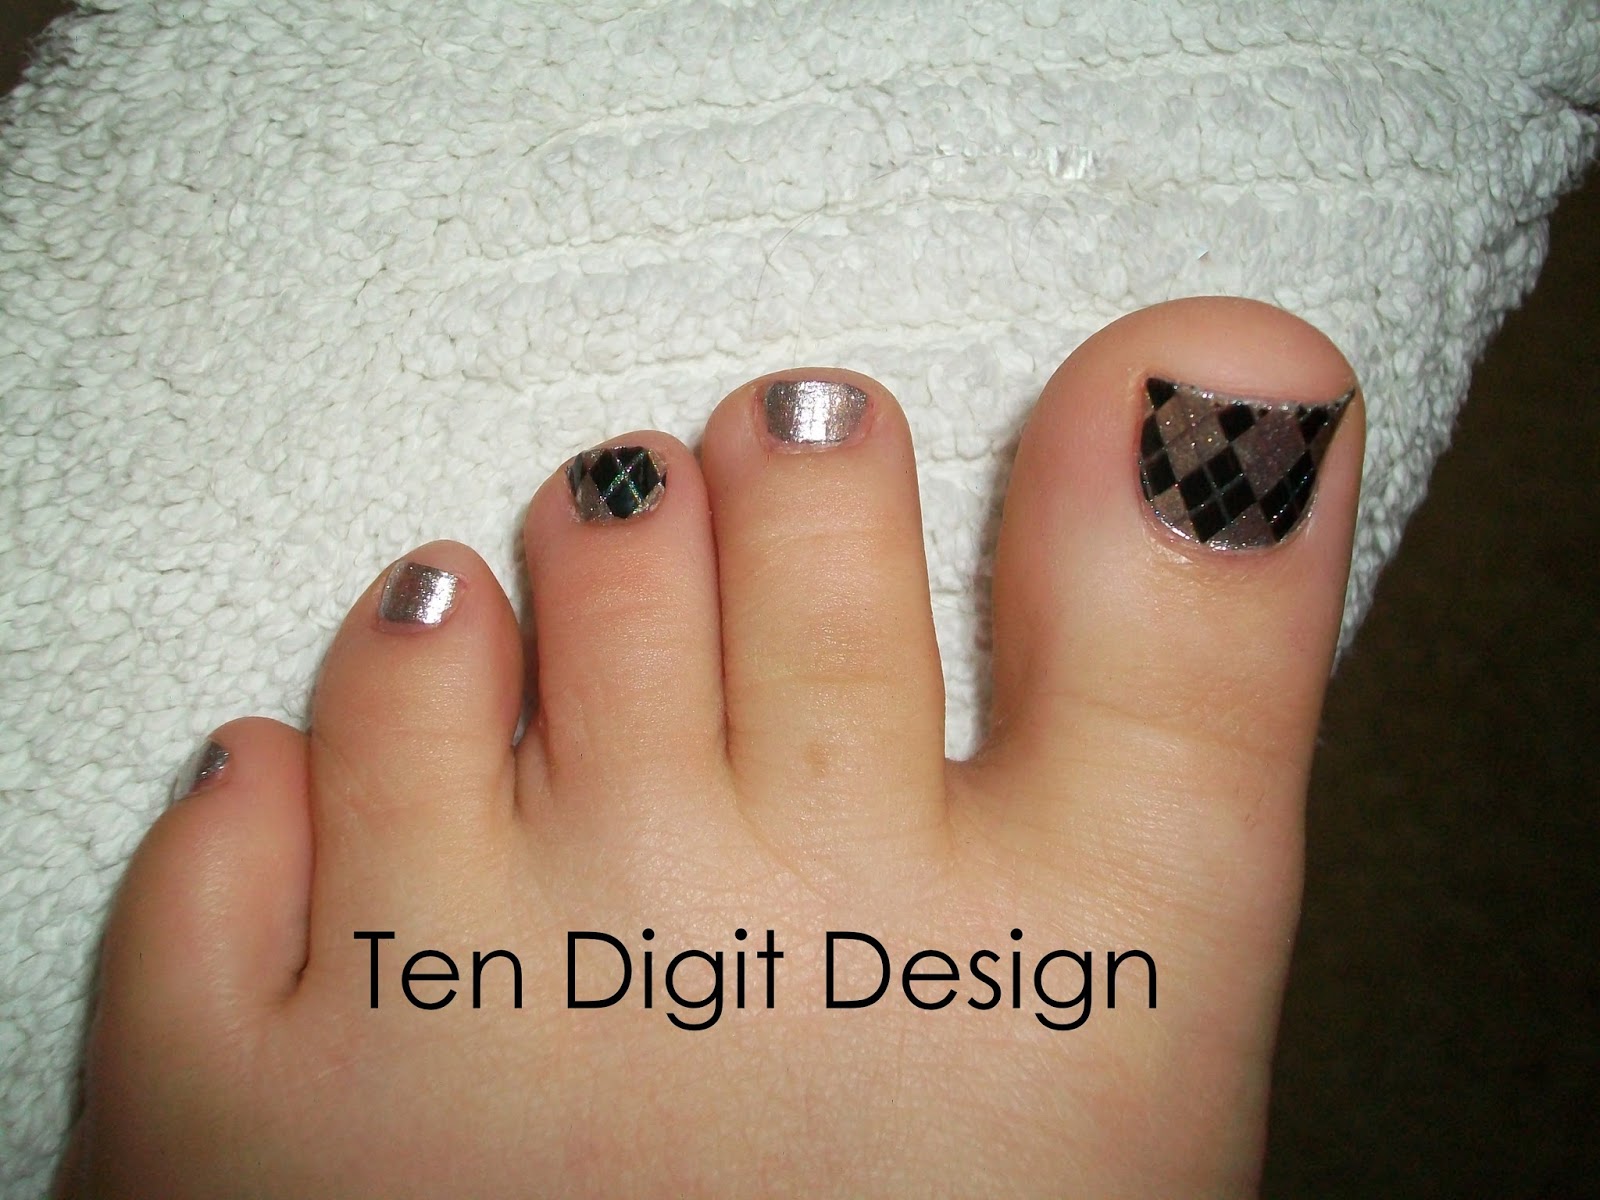
I used Rimmel 60 Seconds in Caramel Cupcake as my base color and then applied a coat of Sally Hansen Dries Instantly to make sure that the base was totally set before I applied striping tape, that I purchased from Amazon, to my nails.  After I applied my striping tape and painted over top with Covergirl Out of the Blue, I immediately removed the tape using tweezers.  That left me with a tan stripe across each nail.  I then applied some silver 1.5 mm studs (from Born Pretty Store) using dots of Sally Hansen Dries Instantly as my "glue."  After everything was dry I applied a thick coat of Dries Instantly and then a coat of NYC Matte Me Crazy.  

Sunday, August 25, 2013

Stamping Again!

Hi!  Today I had a great time stamping my nails!  The colors that I used worked super well and the images came out very clear:


I used Sally Hansen White On as my base color, the blue that I stamped with is Milani Sail Away and the copper is Essie Penny Talk.  The plates that I used were Bundle Monster BM-314, BM-315, and BM-319.  In the pictures I do not have a top coat on yet because I wanted to let the polish dry for a while longer.  I used Sally Hansen Dries Instantly after, though.

I am very happy with how the images came out.  I would highly recommend these polishes for stamping with.  I really like paisley and I decided to do multicolored paisley.  If I had not accidentally overlapped the copper on the blue, it would look even better.

Stamping is loads of fun, but it takes a lot of practice.  I still haven't mastered it.  A really great blog that got me into nail stamping is The Nailasaurus.  You should check her out!  She is a pro at stamping and nail art in general!

Thursday, August 22, 2013

Subtle Stamping

I've really been on a nail art kick lately!  Today I decided to do some stamping.  I hadn't stamped in a really long time.  The final effect I achieved today wasn't as noticeable as I was hoping it would be, but it is nicely subtle:


The colors weren't coming out right inside, so I decided to take the picture outside on my worn picnic table.  Not the best backdrop, but whatever.
Anyway, the base color that I used is Essie Chinchilly, the stamping color that I used is Essie Haute as Hello and the stamping plate is Konad m64.  I used Sally Hansen Dries Instantly as my top coat.  When I took this picture I actually hadn't applied a top coat to my stamped nails because I wanted to allow it a little more time to dry.  If you have any questions about nail stamping, just leave a comment below and I'll get back to you.  =)  

Tuesday, August 20, 2013

I'm Feeling Dotty!

Yes, I know the title is corny, but I am not too great at naming my posts.  Haha!
Today I painted my nails one of my favorite colors.  After a few hours I decided to make them a little more fun by adding white polka dots:


I used Avon Nailwear Pro in Blossom for my base color and the white dots are Sally Hansen Hard as Nails Xtreme Wear in White On.  I used Sally Hansen Dries Instantly (which really does dry super fast and never lets your sheets leave marks on your nails at night, even in humid weather) as my top coat.

I used a dotting tool to make the big and medium dots and a toothpick to make the small dots.  The small and medium dots actually look about the same on my left hand.  They came out better on my right because I made sure that the toothpick that I used didn't have dried nail polish on the tip before I started dotting.  If you don't have a dotting tool you can always use the colored end of a straight pin, a straightened bobby pin, or a toothpick to make all different sized dots.  Dotting tools are fairly inexpensive on websites like eBay and Amazon, though.

It is fun to make a manicure just a little more fun and cute by doing such simple techniques!  

Sunday, August 18, 2013

Five Shades of Blue

Hi!  Work has been busy for me for this past week, but I finally got around to painting my nails again.  I had seen many pictures of this nail art style on the internet and I finally painted it on my own nails.  I used a bunch of my blue polishes and painted a different shade of blue on each nail:


In the top photo I used my camera flash.  The second photo was taken under my fluorescent desk lamp.
On my thumb I used Sally Hansen Complete Salon Manicure in Thinking of Blue; on my index finger I used Avon Mega Watt in Shock; on my middle finger I used Rimmel London 60 Seconds in Blue Eyed Girl; on my ring finger I used Covergirl Outlast Stay Brilliant in Out of the Blue; lastly, on my pinky I used Essie in Borrowed & Blue.  The 2 mm silver studs are from Born Pretty Store and I used two coats of Sally Hansen Dries Instantly as my top coat.

I can't wait to use different shades of pink to do this style!

Monday, August 12, 2013

Nail Stickers

Today I took off my Sally Hansen nail polish strips.  They were hard to get off, so I decided to remove them using the tin foil method.  I soaked cotton balls in polish remover and secured them to my nails with squares of tin foil.  I let them soak for ten minutes and I made sure to pinch my nails while pulling off the tin foil covered cotton balls.  That took the polish off very easily.

I decided to use some nail stickers today:


Nail stickers are extremely easy to use and they look great.  I do not know the brands of the ones I used. The peacock feather on my thumbnail came from a set that I got from Walmart.  The light blue polish that I used is Essie in Borrowed & Blue.  The lavender Is Rimmel London Lasting Finish Pro in Wild Orchid.  I put two coats of my Sally Hansen Dries Instantly top coat on top of my completed design.  

Sunday, August 11, 2013

Update on Sally Hansen Salon Effects

Hello!  I have now been wearing my Sally Hansen Salon Effects Real Nail Polish Strips for nearly five days.  They still look pretty good.  They wore off a teeny bit at the tips, but I am hard on my nails and I went swimming a few times with them.  I actually think they were originally worn off a little bit just from filing off the excess while applying them.  I would definitely recommend these strips to people if they wanted to have fun and fancy nails.  The package says they last for up to ten days and I guess they would, but I wouldn't keep them on that long because of how fast my nails grow.

Wednesday, August 7, 2013

Trial of Sally Hansen Salon Effects

Today I used Sally Hansen Salon Effects Real Nail Polish Strips for my first time.  I am going away for a few days and I wanted to have something special on my nails that wouldn't chip off right away.  The application was surprisingly easy!  I had heard that it was, but I was skeptical.  I used the design "Prep's Cool" and this is the final effect:


I purchased my box of these at a "Five Below" for only $3!  They're usually between $8 and $10.  I have short nails, so I was able to cut each nail polish strip in half.  The entire box came with sixteen strips (two packets of eight), but I used only eight of them.  After you open a packet of the nail polish strips, you cannot save the rest because they will dry out and become useless.  So, to avoid wasting them, I put some on my toenails too:


The silver polish that I used was Metal Head by Icing.  The whole process of applying the strips to my fingernails took around a half hour.  If you are experienced in using these, that time could probably be much shorter.

I applied a coat of Sally Hansen Dries Instantly on top to ensure that they last for a decent amount of time.  If you have any questions about these, just comment in the comment box below!

Monday, August 5, 2013

I Just Created a Blog!

For a long time now I have been enjoying visiting other people's nail art blogs, so I suddenly decided to create my own!  I am very new to blogging, so it will take me a little while to figure everything out, but I wanted to make a first post to test everything out!

A few days ago I created a Scotch tape manicure:


The base color I used was Rimmel London 60 Seconds in Caramel Cupcake.  Then I applied Scotch tape where I did not want to paint any of my black.  The black that I painted over top was Sally Hansen Hard as Nails Xtreme Wear in Black Out.  For my top coat I used Sally Hansen Dries Instantly.

I thought of this design one night as I was trying to sleep and, luckily, it turned out just the way I was picturing it!  I hope you enjoy!