Showing posts with label Rimmel Wild Orchid. Show all posts

Monday, October 27, 2014

Cotton Candy Gradient


Whoa.  I cannot believe I haven't posted in almost a month.  School's been busy.  Tonight I, maybe, could be studying a bit more, but I was suddenly overwhelmed with the overwhelming desire to blog.  So, you see what won.  I haven't done much nail art recently.  This art is from weeks ago.  I am looking forward to trying out one thing for Halloween, though.  I'll need to get on that soon!  Anyway, here's what I came up with a while ago:

cotton candy gradient nails

I started out with a coat of Essie Protein Base Coat.  I then painted on two coats of Sinful Colors Snow Me White.  After that, I painted on a coat of Sally Hansen Dries Instantly to avoid pulling up my base color with my sponge.  

cotton candy gradient nails

When that was all dry, I took a makeup sponge and painted on a stripe of three different colors.  I made sure they all overlapped a bit to help the color transition to be smooth.  The purple is Rimmel Wild Orchid; the blue is Essie Blue Rhapsody; and the pink is Sally Hansen Pink Blink.  I stippled the color over my nails with the makeup sponge until the color was as opaque as I wanted it.  I flipped the sponge over so that the order of the colors alternated on my nails.  On my pointer and ring fingers I wanted the purple to be at my cuticles, and I wanted the pink to be at my cuticles on my other three nails.

 I then applied two coats of Sally Hansen Dries Instantly.  It's super fun to do gradients because the thin layer of polish dries really fast and a top coat will only help the colors to blend in more.  You don't really need to wait to apply the top coat!

cotton candy gradient nails

This rounded nail shape has been working out for me so well!  I can grow my nails longer and I don't have any more sharp corners that catch clothing and/or break off!  My manicures last for so long because no part of my nails bend!  They're way stronger like this!  The corners of my nails used to always bend and then the polish would chip off.  Also, my actual nails have not been flaking!  Certain nail shapes work better on different people.  Experiment until you find out what's best for you!

I will try to post more often.  I really do enjoy blogging.  The wisest thing I have read on a blog is that you should not blog when you don't feel like it.  A blog is supposed to be fun, and if I don't feel like writing a post, the post will not be of high quality.  It can't be forced.  So, anyway, I haven't forgotten about the blog and I hope to do some more manicures!  I am super excited to do a Halloween manicure!  I hope you have all been doing well!  

Remember to check me out on Pinterest and Facebook!  I am on Pinterest all the time!  My Facebook and Pinterest are linked on the right side of my blog!

Wednesday, June 4, 2014

Interspecies Romance

I wanted to use some nail stickers to create a super cute manicure! I sort of just made this manicure up as I went along and I am extremely happy with the result. Sorry about the state of my cuticles. They are very dry for some reason:
I started out with a coat of Essie Protein Base Coat. I then painted on two coats of Essie Borrowed & Blue. After that had dried for a while, I applied strips of striping tape a few millimeters away from the tips of my nails. I used these so I could create perfectly straight french tips. On my thumb, pointer, and middle fingernails I used Sally Hansen Rockin' Hard, and on my ring and pinkie fingernails I used Rimmel Wild Orchid. (I just used the brushes in the bottles.) I really like the asymmetrical result. I would usually paint my nails with alternating colors, but I wanted to try something different. After painting on each french tip, I immediately took a pair of tweezers and removed the striping tape. Then, using the tweezers again, I applied a poodle nail sticker to my ring fingernail and made it appear as if it was standing on the french tip. I also took a cat nail sticker and made it stand on the french tip on my pointer fingernail. I was going to leave it at that, but then I was looking at the nearly finished product and I imagined a heart on my middle fingernail. I HAD to add that heart, and luckily I did have a heart nail sticker! (If I hadn't, I would have used polish.)
I finished off with two coats of Sally Hansen Dries Instantly.

Monday, May 19, 2014

Multicolored Striping

So, since I have been done with college for the summer for a week, I have been able to do my nails a little more often and am enjoying posting more. I have seen multiple manicures like the one I have done, but usually black is the color that goes over everything since it is so opaque. I wanted my design to look more bright and springy, though. First I applied a coat of Essie Protein Base Coat. I am really liking this. (I have noticed that my nails are still peeling, so I think Sally Hansen Double Duty is fine. They are probably still recovering from a dry winter. They are better than they were.) After the base coat, I applied a stroke of Sally Hansen Coral Reef down one side of my nails and Sally Hansen Jazzy Jade down the other:
After that was dry, I applied a stroke of Rimmel Wild Orchid down the center of each nail.
After that was dry, I applied a coat of Sally Hansen Dries Instantly so the striping tape wouldn't pull up my base color. I then applied striping tape in random patterns on my nails. I made sure most of the tape was going in some horizontal or diagonal direction on my nails because vertical striping tape wouldn't show off the tricolored base. I then painted over the striping tape with China Glaze Designer Satin and immediately removed the tape. (Remember to remove the tape in the opposite order you applied it in. You don't want to be pulling a piece that is under another piece and ruin your work.) This isn't completely opaque, so the base colors show through a bit. I like the effect, though:
I applied a coat of Dries Instantly at the end and then a coat of NYC Matte Me Crazy. Matte polishes always remind me of wax. I actually messed up my ring fingernail a little because I bumped it on my paper towel right after removing the striping tape. I always get very aggravated when I mess up a nail, but I have learned to be calmer about it. You will probably be able to fix small mistakes. Just relax. I touched up the smudges with a nail art brush with the appropriate colors on it to go over my mistakes to make the lines clear again. Also, people do not notice little mistakes in your manicure. They generally look at the entire effect. So, don't sweat the little mistakes!!! =)

Sunday, November 3, 2013

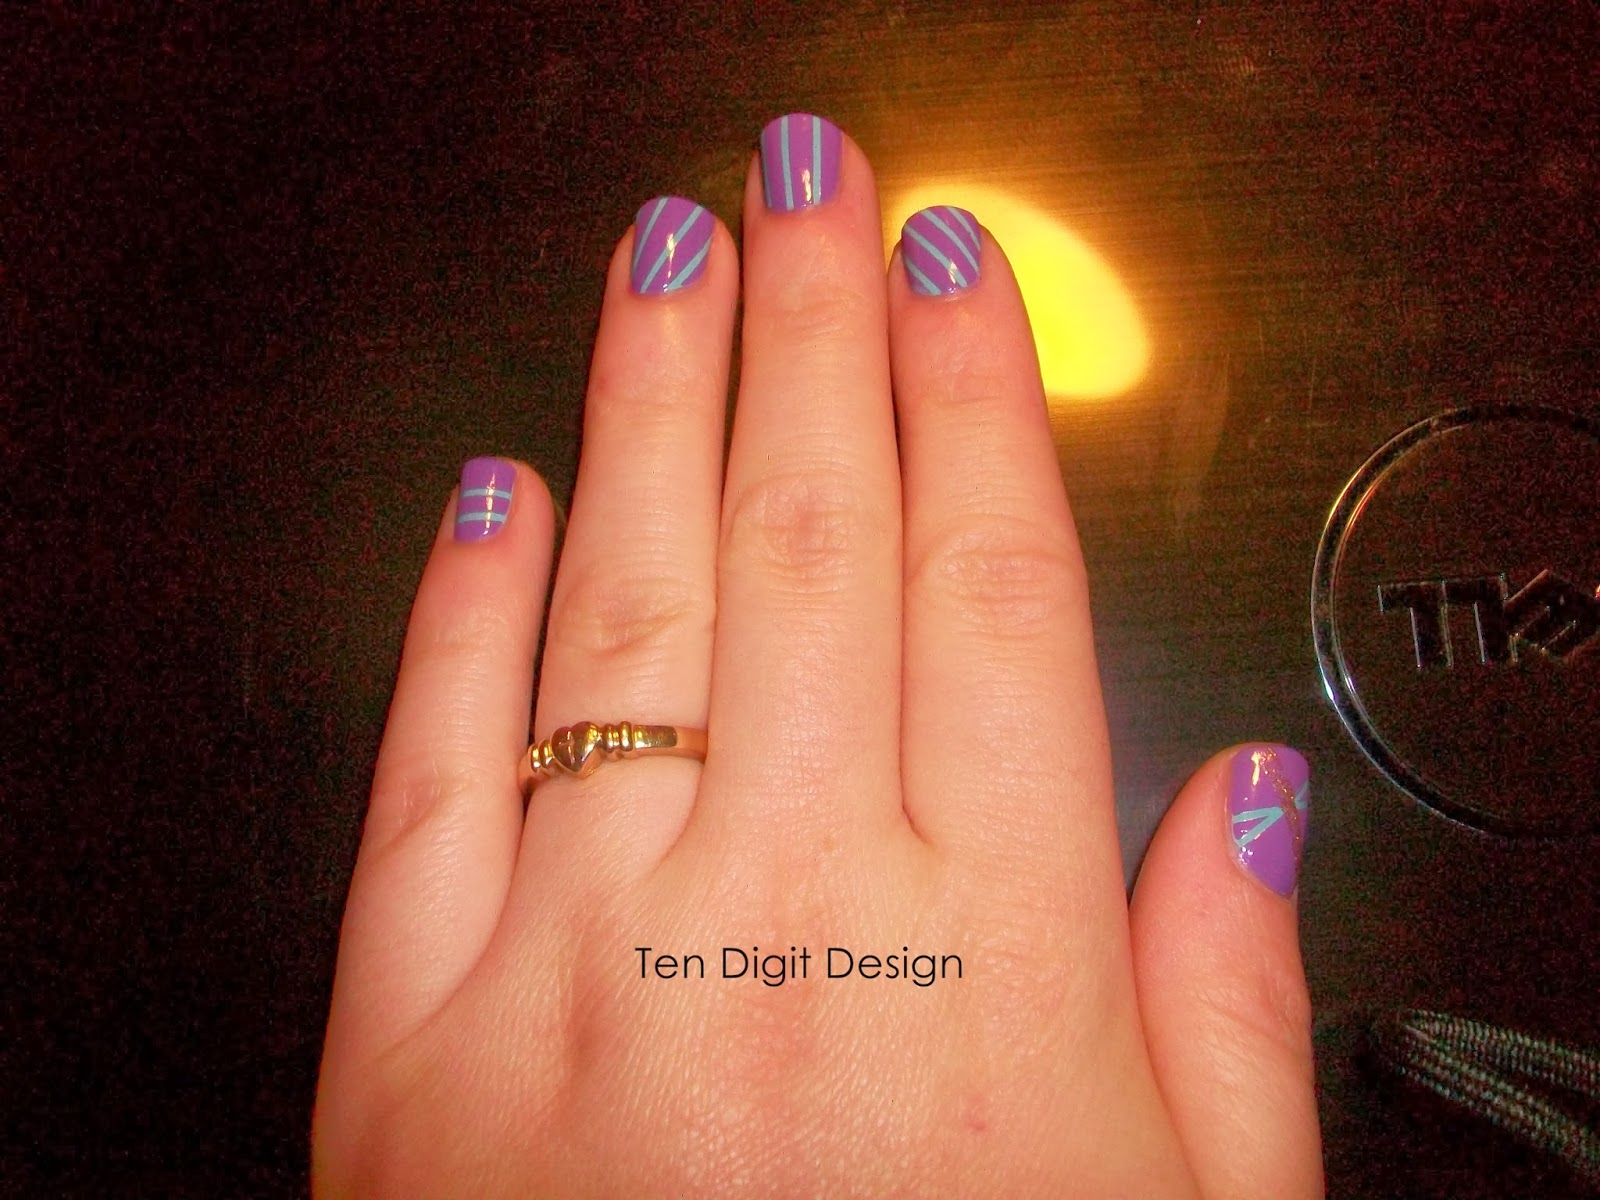
Stripes Galore

I have not used striping tape for a while, so I decided to today:


I used two coats of Rimmel Mintilicious as my base color.  After that was dry I applied a coat of Sally Hansen Dries Instantly to make the bottom color not come up with the striping tape.  After that was dry I applied striping tape where I wanted to see the bluey color.  I made sure the tape was pressed down around my cuticles and then painted on Rimmel Wild Orchid.  I then immediately removed the striping tape with a pair of tweezers.

Once all that was dry I used a nail art brush dipped in acetone to create a clean line around the edges of my nails.  I then used a striper nail art brush dipped in Nicole Glitter In My Stocking to make a sparkly line across my thumb nails.  I finished off the manicure with two coats of Sally Hansen Dries Instantly.

Remember: if you have overlapping striping tape, keep track of which pieces are on top and which are on bottom (the order you placed them on) to avoid ruining the manicure while removing the tape.  I ALWAYS forget to pay attention to that and then have to guess the order in which I placed the tape.  I decided to put that gold stripe on my thumb because it looked and little empty AND because I messed up the center of the "X" because I forgot the order in which I placed the tape.


Monday, August 12, 2013

Nail Stickers

Today I took off my Sally Hansen nail polish strips.  They were hard to get off, so I decided to remove them using the tin foil method.  I soaked cotton balls in polish remover and secured them to my nails with squares of tin foil.  I let them soak for ten minutes and I made sure to pinch my nails while pulling off the tin foil covered cotton balls.  That took the polish off very easily.

I decided to use some nail stickers today:


Nail stickers are extremely easy to use and they look great.  I do not know the brands of the ones I used. The peacock feather on my thumbnail came from a set that I got from Walmart.  The light blue polish that I used is Essie in Borrowed & Blue.  The lavender Is Rimmel London Lasting Finish Pro in Wild Orchid.  I put two coats of my Sally Hansen Dries Instantly top coat on top of my completed design.