Showing posts with label stickers. Show all posts

Tuesday, June 23, 2015

Asia Inspired


So, I had nail stickers and a stamping plate that were Asian themed, so I decided to put them to good use and do an Asian themed mani!  I am really liking how it turned out!

asian themed nail art

I started out with a coat of OPI Natural Nail Base Coat.  I then applied two coats of each base color.  I used Sinful Colors Snow Me White on my thumbs and ring fingers; Sinful Colors Black on Black on my pointers and pinkies; and Sinful Colors Gogo Girl on my middle fingers.

asian inspired manicure

I then applied nail stickers to my thumb and middle fingernails.  I stamped my pointer and ring fingers with Bundle Monster's plate BM-405.  I used an old black and an old white polish to do this.  The thicker the polish, the better it will be for stamping.  So, don't throw out your gloopy polishes!  They may be good for stamping!

asian inspired manicure

I finished off with two coats of Sally Hansen Dries Instantly.

Sunday, February 22, 2015

Gradient Zigzags

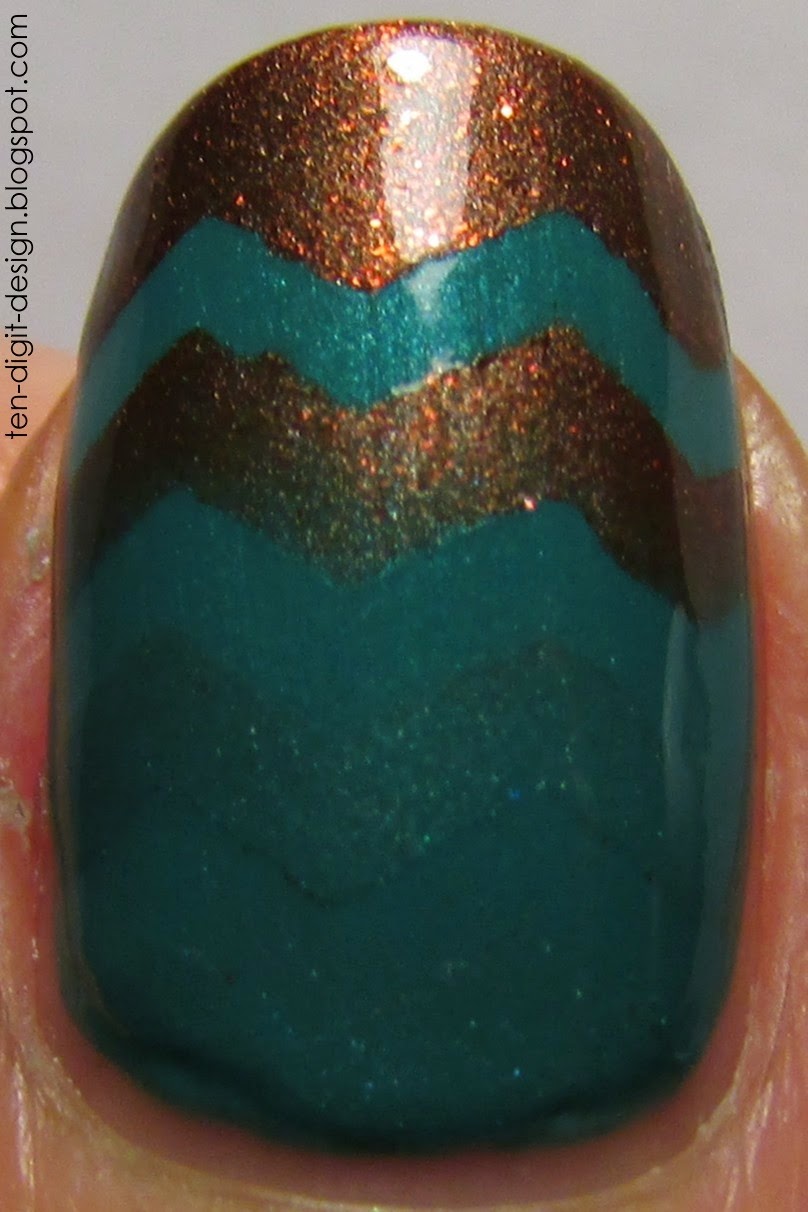
Color combinations can really make a manicure.  Even if your nails are painted just a couple basic colors, it can look SUPER cool if the colors go well together.  I am not too great at finding interesting color combinations, but this manicure's colors made me really happy.

gradient nails with zigzags

I started out with a base coat of Sally Hansen Double Duty.  I then painted on two coats of Sally Hansen Jazzy Jade (the teal color.)  After that, I painted a coat of Sally Hansen Dries Instantly over everything to get them ready for tape and sponging.  I took a makeup sponge and applied Sally Hansen Jazzy Jade and Sally Hansen Kinetic Copper (which is a magnetic polish that is also super pretty without the magnetic effect) and painted them onto the sponge so they overlapped in the middle.  

zigzag gradient nails

I then rolled the sponge over all of my nails, except for my ring fingers and thumbs.  For those nails, I took some zigzag tape (which I got from Amazon) and applied three strips across each nail.  I stuck the tape on the back of my hand before applying it to my nails so that it would be gentler on the polish.  I always try to minimize the chance of tape removing my base color.  That is THE WORST!  I then used the same sponge and rolled it over these nails until I got my desired gradient.  I removed the tape after doing each nail.  I always reapply a good amount of polish to the sponge in between each nail.

gradient zigzag nails

I decided to stick a holographic, mirrored star sticker on my ring finger.  The points were sharp, so I trimmed them a teeny bit with small scissors.  I then applied two coats of Dries Instantly over everything.  Gradients dry super fast, so you don't really need to wait to apply your top coat.  I applied three coats of top coat on my ring finger to make the star not stick out as much.

Follow me on Snapchat!

Friday, February 20, 2015

Water Decals Again!


I had only ever used nail tattoos (water decals) once before.  That was last fall.  I blogged about it.  I actually forgot exactly how to apply them, so I referred to that post before getting started today (http://ten-digit-design.blogspot.com/2014/09/nail-tattoos.html).  

nail tattoos

I started out with a base coat of Sally Hansen Double Duty.  I then painted two coats of polish on each nail.  On my thumbs and ring fingers (my accent nails) I used Sinful Colors Snow Me White.  I used Essie Loophole on the rest of the nails.  I then used tweezers to apply the tiny mirrored stickers on the silver nails.

nail tattoos

Before I even started painting my nails, I cut out pieces from the small sheets of nail tattoos I got from Walmart ("Heart 2 Art" brand).  I cut them so they were roughly the shape of my nails.  When I was ready to apply them, I filled a shot glass with water and then used tweezers to pick one up and dip it into the water for a couple seconds.  I then gently pressed the tattoo over my nail for ten seconds and then carefully slid off the paper backing.  

nail tattoos

There was a bit of excess tattoo at the end of some of the nails, so I took a nail buffing file and lightly filed the end of the nail with the non-abrasive side until I could easily pull off the excess.  I used my tweezers and gently pressed them along my cuticles to break off any excess there.  Acetone on a nail art brush can help you to remove the tiny bits that may be left over.  I'd suggest getting as much off as you can before resorting to the acetone because it melts the excess tattoo and creates a sticky residue. 

nail tattoos

To minimize cleanup, try to cut the tattoos as close to your nail shape as you can.  You can see on my ring finger that I accidentally wrinkled the tattoo while applying it.  You need to be very careful when sliding off the backing.  It isn't as noticeable in person, though.  Once you get the hang of these, they're actually a breeze to apply and clean up.  I would definitely recommend trying them out!  They are a lot of fun! 

I finished off with two coats of Sally Hansen Dries Instantly.
Follow me on Snapchat!

Wednesday, June 4, 2014

Interspecies Romance

I wanted to use some nail stickers to create a super cute manicure! I sort of just made this manicure up as I went along and I am extremely happy with the result. Sorry about the state of my cuticles. They are very dry for some reason:
I started out with a coat of Essie Protein Base Coat. I then painted on two coats of Essie Borrowed & Blue. After that had dried for a while, I applied strips of striping tape a few millimeters away from the tips of my nails. I used these so I could create perfectly straight french tips. On my thumb, pointer, and middle fingernails I used Sally Hansen Rockin' Hard, and on my ring and pinkie fingernails I used Rimmel Wild Orchid. (I just used the brushes in the bottles.) I really like the asymmetrical result. I would usually paint my nails with alternating colors, but I wanted to try something different. After painting on each french tip, I immediately took a pair of tweezers and removed the striping tape. Then, using the tweezers again, I applied a poodle nail sticker to my ring fingernail and made it appear as if it was standing on the french tip. I also took a cat nail sticker and made it stand on the french tip on my pointer fingernail. I was going to leave it at that, but then I was looking at the nearly finished product and I imagined a heart on my middle fingernail. I HAD to add that heart, and luckily I did have a heart nail sticker! (If I hadn't, I would have used polish.)
I finished off with two coats of Sally Hansen Dries Instantly.

Thursday, December 19, 2013

Christmas Wreaths

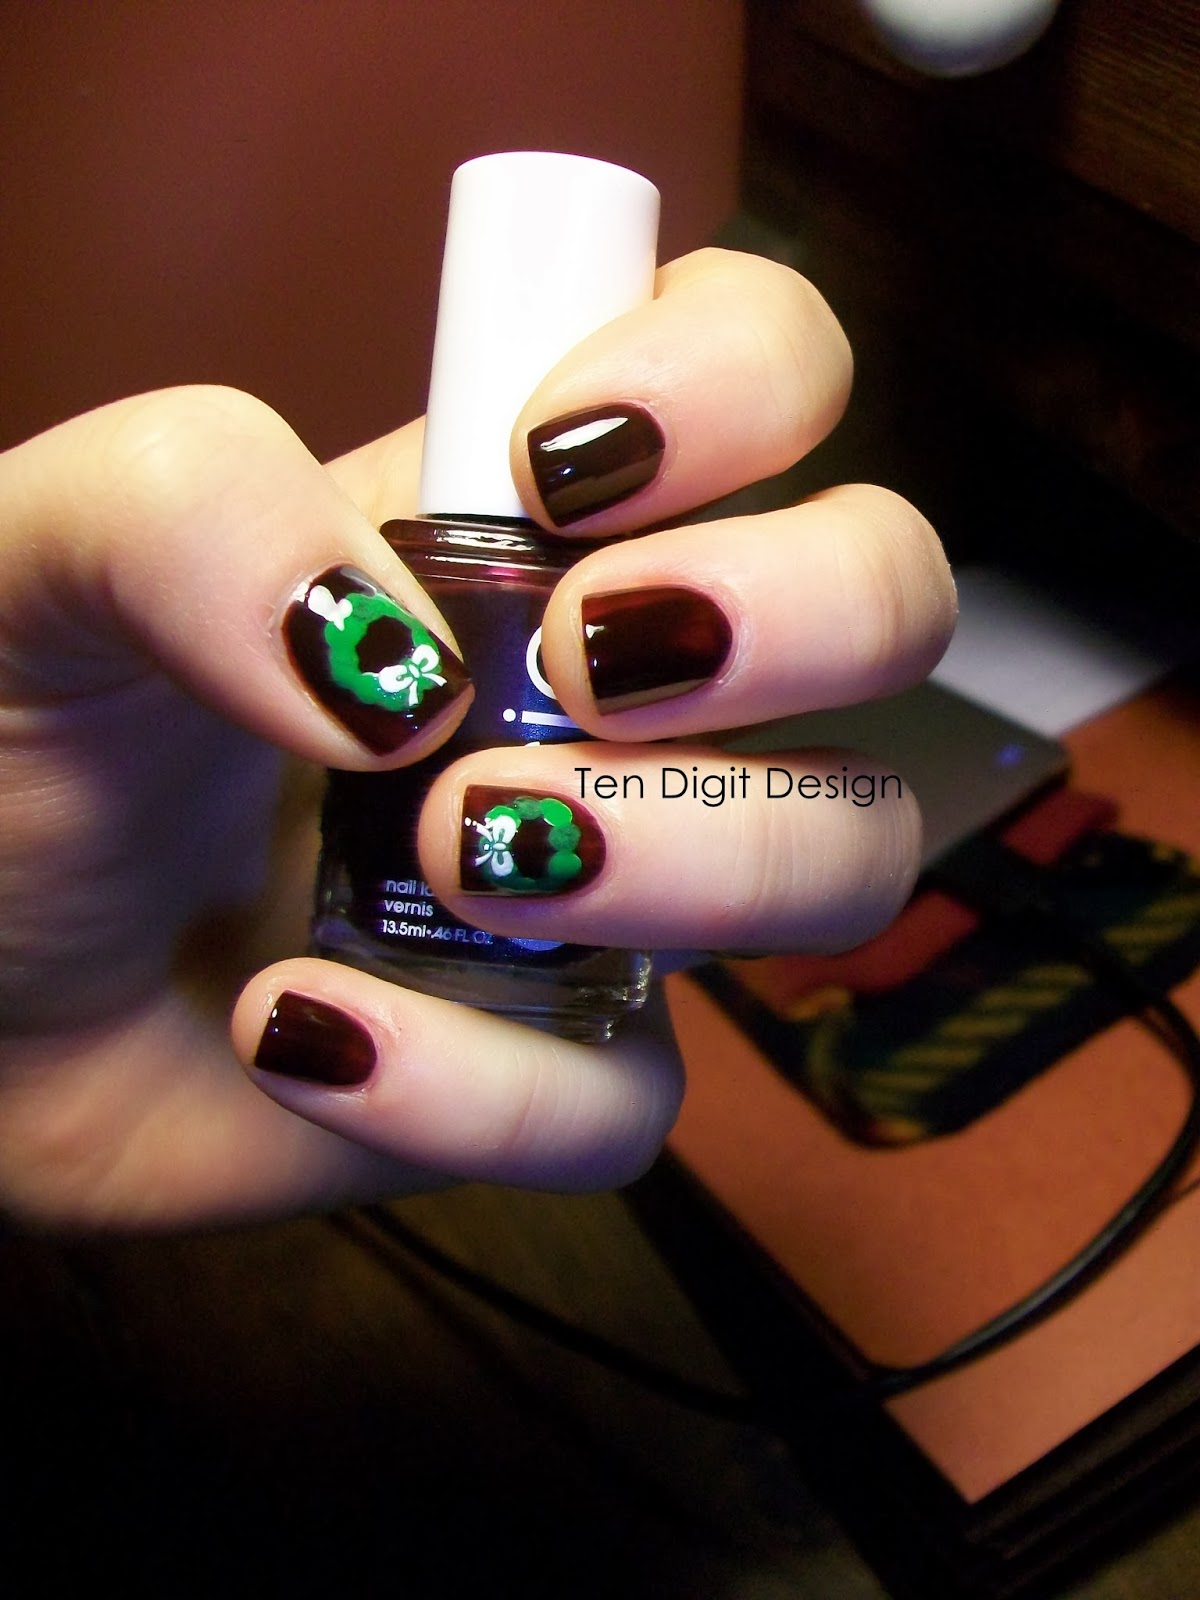
I have been looking forward to painting my nails with wreaths on them:


My base color is Essie Wicked, one of my all time favorite nail polish colors.  I used two coats of that.  Then I used a dotting tool and made rings of white dots to make the wreaths.  The reason I used white is because colors show up better on a white base.  I then dotted the color over the dry white dots.  Originally I made dark green and light green alternating dots, but, even with the white background, the dark green did not show up well against the dark red.  So, I went back over the dark green with the light green which is NYC High Line Green.  When all that was dry I applied some bow nail stickers and then put two coats of Sally Hansen Dries Instantly over everything.

Friday, October 25, 2013

Statue of Liberty

So, tomorrow I am super excited to visit the Statue of Liberty.  I got these multicultural nail stickers from Walmart a while ago and have been looking forward to wearing them.  I bought the bluey-green nail polish at Walmart today, specifically for this manicure.  I know it's not the exact color of the Statue of Liberty, but I am happy with it:


I painted my ring fingers and thumbs with Rimmel Mintilicious and the other nails with Essie Penny Talk.  I got the 2 mm rhinestones from Amazon.  They came in a set of 12 colors and were only a few dollars.  I stuck them on with Sally Hansen Dries Instantly and then painted that over top of all my nails.  I hope everyone has a great weekend!  If you ever have any suggestions for manicures, feel free to leave a comment!

Monday, August 12, 2013

Nail Stickers

Today I took off my Sally Hansen nail polish strips.  They were hard to get off, so I decided to remove them using the tin foil method.  I soaked cotton balls in polish remover and secured them to my nails with squares of tin foil.  I let them soak for ten minutes and I made sure to pinch my nails while pulling off the tin foil covered cotton balls.  That took the polish off very easily.

I decided to use some nail stickers today:


Nail stickers are extremely easy to use and they look great.  I do not know the brands of the ones I used. The peacock feather on my thumbnail came from a set that I got from Walmart.  The light blue polish that I used is Essie in Borrowed & Blue.  The lavender Is Rimmel London Lasting Finish Pro in Wild Orchid.  I put two coats of my Sally Hansen Dries Instantly top coat on top of my completed design.