Showing posts with label swatch. Show all posts

Monday, April 27, 2015

Milani Silver Dazzle

Sorry for my absence again!  I graduate in a little under three weeks, so I am finishing up the semester.  My sister let me use one of her polishes for this post.  It is from Milani's One Coat Glitter collection.  It's called Silver Dazzle.  This is a seriously cool polish.

milani one coat glitter silver dazzle
under fluorescent light
 If you think this looks cool, just look at the pictures taken in the sunlight.  I started out with a coat of OPI Natural Nail Base Coat (which is a GREAT base coat.  My nails aren't staining and this polish seriously dries immediately) and then applied two coats of Milani Silver Dazzle.  It dried super fast because it is mostly glitter.  I didn't really need two coats.  This really is a one coat glitter polish.  I finished off with two coats of Sally Hansen Dries Instantly.  The tin foil method took the polish off really easily.  So, here are the super cool daylight pics:

milani one coat glitter silver dazzle

milani one coat glitter silver dazzle
perfect sparkles!

milani one coat glitter silver dazzle

milani one coat glitter silver dazzle

milani one coat glitter silver dazzle

milani one coat glitter silver dazzle

Monday, April 6, 2015

Essie Just Stitched

The nail polish that I had ordered came in the mail a few days ago!  I had told you in a previous post that I saw Hannah Rox It on Facebook using this polish, and I really wanted to buy it as soon as I saw it.  This polish, Essie Just Stitched, is from the Cashmere Matte collection.

essie just stitched

I started out with a coat of OPI Natural Nail Base Coat.  That was my first time using this base coat, and I like it so far.  It dried super fast.  I then applied two thick coats of Essie Just Stitched.  This, too, dried really fast.  Since this is a matte polish, I did not use a top coat.  I did this manicure yesterday and it is holding up well. 

essie just stitched

This polish is a matte baby pink with a slight iridescent shimmer to it.  It is SO pretty!  It was definitely worth ordering!

essie just stitched

Thursday, April 2, 2015

Sally Hansen Salon Effects: Bling It On

I decided to use some more of my Sally Hansen Salon Effects Real Nail Polish Strips.  I used the color Bling It On--a pink glitter.  I took pictures under a fluorescent light, and in the sunlight.  They are SO beautiful!

sally hansen salon effects real nail polish strips
Fluorescent light

sally hansen salon effects real nail polish strips
Sunlight!

These strips came in a pack of a bunch of different kinds.  I got them for Christmas 2013.  They are actually a bit too old.  They weren't as sticky and they should have been, so a couple are lifting up near my cuticles.  They still look super pretty, though, so I don't mind too much.

I applied them over bare nails.  I only used one package because my nails are short enough that I can cut each in half to get double the uses out of them.  I used tiny scissors to trim the edges down so they could fit my tiny nails.

sally hansen salon effects real nail polish strips
sunlight

I went through the pack of different sized strips and figured out which would fit best on each nail.  I threw out the extras in the package because once they're opened, they begin drying and cannot be used again.  (You can always use them on your toenails if you don't want to waste them!  I have done that before!)  Once I applied a strip, I cut it in half and applied the rest to my nail on the opposite hand. 

sally hansen salon effects real nail polish strips
sunlight
 
I then used the buffer side of the nail file that came with the strips and smoothed it over the strip on my nail to make sure it was securely attached.  Then I pressed the buffing side of the file on the tip of my nail until the excess strip could easily and cleanly be removed.

I finished off with two coats of Sally Hansen Dries Instantly.  

Look how pretty it is close up!  I love these!  It is hard to concentrate while driving because I just want to stare at them all the time!

sally hansen salon effects real nail polish strips bling it on
sunlight

sally hansen salon effects real nail polish strips bling it on
sunlight

 When I want to take these off, I am going to use the foil method.  I am sure these would be terrible to take off without soaking them at all.  To do the tin foil method, take 10 squares of tin foil and then put a bit of cotton ball soaked in nail polish remover on each nail and wrap the foil over the tips of each of your fingers.  Leave this on for 10 minutes, and then, when taking them off, pinch the nail and pull off the foil and cotton ball.  This will remove almost all, if not all, of the polish.  This is a great method to use on any glitter polish, or other hard-to-remove polishes!

Follow me on Snapchat!


Monday, February 16, 2015

OPI's I'm Not Really a Waitress

I was so super excited because for Valentine's Day my mom and dad got me my first OPI polish.  I have been hearing about and seeing OPI for years, but as a college student I try not to buy higher end drugstore polishes (because of the prices.  I really only buy Essie when I find a great sale.)  I decided to swatch it for you.  It is called I'm Not Really a Waitress.  I absolutely LOVE the name!  The name alone sometimes makes me want to buy certain polishes.  Do you know what I mean?


opi i'm not really a waitress
   
I applied a base coat of Sally Hansen Double Duty and then applied two coats of the polish.  It was already very opaque after the first coat.  It's a deep red color with some shimmer in it.  I finished off with two coats of Sally Hansen Dries Instantly.

opi i'm not really a waitress

opi i'm not really a waitress

This color is just so classy and elegant and suitable for any time of the year!  (In my opinion, any color is okay for any time of the year.  Paint you nails whatever color makes you happy!)  

I made some adjustments to my settings on Snapchat.  I made it so if you add me, you will be able to see my stories.  Haha!  After telling you guys about my account, I forgot to go to my setting to see if you'd actually be able to see anything from me.  Now it should be all set.  I have been posting on there a lot.  It would be SO fun if you guys followed me!  I post pics of nail art related things and other random stuff.


Wednesday, October 29, 2014

Houndstooth Halloween


So, as promised, here is my Halloween post!  I actually did a manicure four days ago and then decided to add to it.  Here's what I applied four days ago:

sally hansen salon effects check it out

These are Sally Hansen Salon Effects Real Nail Polish Strips.  The pattern is "Check It Out," which is just a houndstooth pattern.  The strips have held up super well over the past few days.  The trick with these is to make absolutely certain that you do not put them too close to your cuticles and that you run the smooth side of the nail file thing that comes with them all over the surface of the strips to make sure they are secured to your nails.  If bits near your cuticles are sticking up, they will continue to stick up more when they dry.  Then they will start flaking off.  

This time I was super careful and they have not been peeling up!  I actually only used one set (instead of both sets that come in a package) because my nails are small and I can cut them in half and use the excess on my nails on my opposite hand.  You cannot save extra strips because they dry out and are then useless.  So, if your nails are small enough, you can get two manicures out of one package!  

sally hansen salon effects check it out


So, anyway, I applied these to my bare nails and then finished them off with two coats of Sally Hansen Dries Instantly.  I wrapped the tips to try to make them last longer.  ("Wrapping the tips" just means running the nail polish brush along the free edge of your nails to seal everything in.)

So, on to the Halloween part!  I decided to use two techniques that I had never used before.  I first used the dry brush technique to rough up the look of the houndstooth.  This means that I made sure that the nail polish brush had almost nothing on it before streaking it over my nails.  You can see what I mean here:

houndstooth halloween nails

I first used Sinful Colors Snow Me White and then applied some Sinful Colors Black on Black.  After this, I taped up my fingers (as you can see above) so I wouldn't make as much of a mess on my hands.  I used the blood spatter technique (which I have been wanting to do ever since The Nailasaurus did her "Dexter" nails: http://www.thenailasaurus.com/2013/09/31DC2013-dexter-splatter-nail-art.html)

I took a regular straw and two different shades of red.  Here is my straw before and after:


I put down a paper towel to make sure I didn't get paint anywhere and then took my first red polish (Rimmel Burgundy Flirt) and used the brush from it to paint a glob onto the end of half of a straw.  I then would position the straw a few inches above my nail and blow out hard.  It was quite difficult and I figured out why.  That polish was rather thick.  The thicker the polish, the harder it is to do this.   I ended up sticking the actual straw into the bottle of polish to make sure I got a lot in it.  I managed to get some spatters on my nails with this polish, but I then used another red (Essie Wicked--a very dark red) and the other section of my straw to add to the spatters.

This polish was thinner, so was much easier to blow.  I just used the nail polish brush to apply some polish to the end.  If you try this and are having a hard time, it could be because of the thickness of your polish.  

If I were to do this again, I would not have added any extra black on my base.  the black makes it harder to see the red.  Also, I would prefer to do it over a white base.  I want to try that some time.  White would make the red really stand out.  I removed the tape on my fingers and used acetone and Q-tips and a nail art brush to clean up everything.  Cleanup took a while.  I then applied two coats of Sally Hansen Dries Instantly.

 So, without further ado, here is my finished product:

houndstooth halloween nails

houndstooth halloween nails

grungy blood spatter nails

grungy blood spatter nails

grungy blood spatter nails


Happy Halloween!

Monday, June 30, 2014

Super Sparkly Nails!

I went on a little trip over the weekend, so I decided to use some Sally Hansen Salon Effects strips. I have gotten better at my application technique. I'll tell you how I applied them down below:
I applied these last Wednesday and had to take them off last night (Sunday) because they had chipped A LOT. These are great fun, but I do not think they last for ten days, as the box says. I really don't mind, though, because I change my nails quite often anyway. So, my grandparents had gotten me a box of a bunch of different Salon Effects strips last Christmas. You are supposed to use a package for each hand, but I save mine by using only one package for two hands. My nails are small, so I am able to apply a strip and use scissors to cut off the excess to use on my opposite hand's nail. I will take you through how I use these: I used one package of Blue Ice strips. They're super sparkly and I LOVE them! I made sure my nails had no lotion or skin oil on them by taking a cotton ball with rubbing alcohol on it and swiping it over all my nails. I then chose the nail polish strips that would fit best on each of my nails. I would apply one and made sure it was not touching my cuticle at all so that it could be totally pressed down onto my nail. I would then use scissors to cut off the excess to use on my other nail. This time, I never used the file tool that came with the strips. I find that that can rough up the strip at the tip of your nail. I let my nails get a teeny bit long before using these so that I could just use my fingers to press on the little bit of excess strip hanging over the tip of my nail. My nail would cut the strip and then I would gently remove that. I recently got a Sally Hansen rubber cuticle pusher (which is making my cuticles look SO great! I would definitely recommend you get one!) and I would use that to press down on the surface of the strip to make sure it was completely adhered to my nails. After applying the strips to all of my nails, I used one of the left over large strips (each package comes with eight so you can try to match them to your nail size) and applied it to my big toenails. I had to throw out the remaining strip. You cannot save these once a package is open because they are made of real nail polish and they dry out. I applied the ones on my toes over top of polish, which is not recommended, but it worked fine. I finished all of them off with two coats of Sally Hansen Dries Instantly. You do not need to use a top coat, but I prefer to. I noticed that, as they were drying on my nails, the edges of the strips near the sides of my nails and my cuticles would lift up a little. It didn't matter much, but it could be that I still had oil residue near my cuticles. Who knows. I was extremely happy with these, though, because of how beautiful they are! I used the tin foil and cotton ball method to remove the strips.

Tuesday, October 15, 2013

Sally Hansen Salon Effects II & Top Coat Review

So, today I decided to do something a little boring.  I have a lot of stuff to do, so I didn't want something that would take multiple steps and take a while to dry.  So, I decided to try out some more Sally Hansen Salon Effects Real Nail Polish Strips.  This time I used Tri-Bal It On:


 I like this print.  I also got this package for only $3 from "Five Below."  I applied two coats of Sally Hansen Dries Instantly over top of the strips.  

If you're looking for a great top coat, you should really try Sally Hansen Dries Instantly.  It really does dry super fast.  It dries completely in literally a couple minutes and it only costs around $3 at Walmart.  My sheets have never left prints in it at night. 

I suppose I am not the best expert on top coats, though, since I have only used four different top coats since I got into doing my nails.  The first was Sally Hansen Diamond Shine Base & Top Coat.  That worked well, I think.  That was the first top coat that I had ever used, though, so I can't really remember how fast it dried or anything.  I do remember it was shiny and strong, though.  I used up the bottle, so I guess I liked it. 

The second top coat I used was Rimmel Base Coat Top Coat Pro.  I really liked that, but I didn't have much to compare it to.  I did notice that I always woke up with sheet prints, though.  At the time, I thought that was normal with nail polishes.

The third top coat I tried was Sally Hansen Strengthening top coat.  That worked well, but didn't dry nearly as fast as Dries Instantly.

So, after this tiring review, I shall conclude that I find Dries Instantly to be the best out of all these.  If you're looking for a good, inexpensive top coat, this is it!

Wednesday, August 7, 2013

Trial of Sally Hansen Salon Effects

Today I used Sally Hansen Salon Effects Real Nail Polish Strips for my first time.  I am going away for a few days and I wanted to have something special on my nails that wouldn't chip off right away.  The application was surprisingly easy!  I had heard that it was, but I was skeptical.  I used the design "Prep's Cool" and this is the final effect:


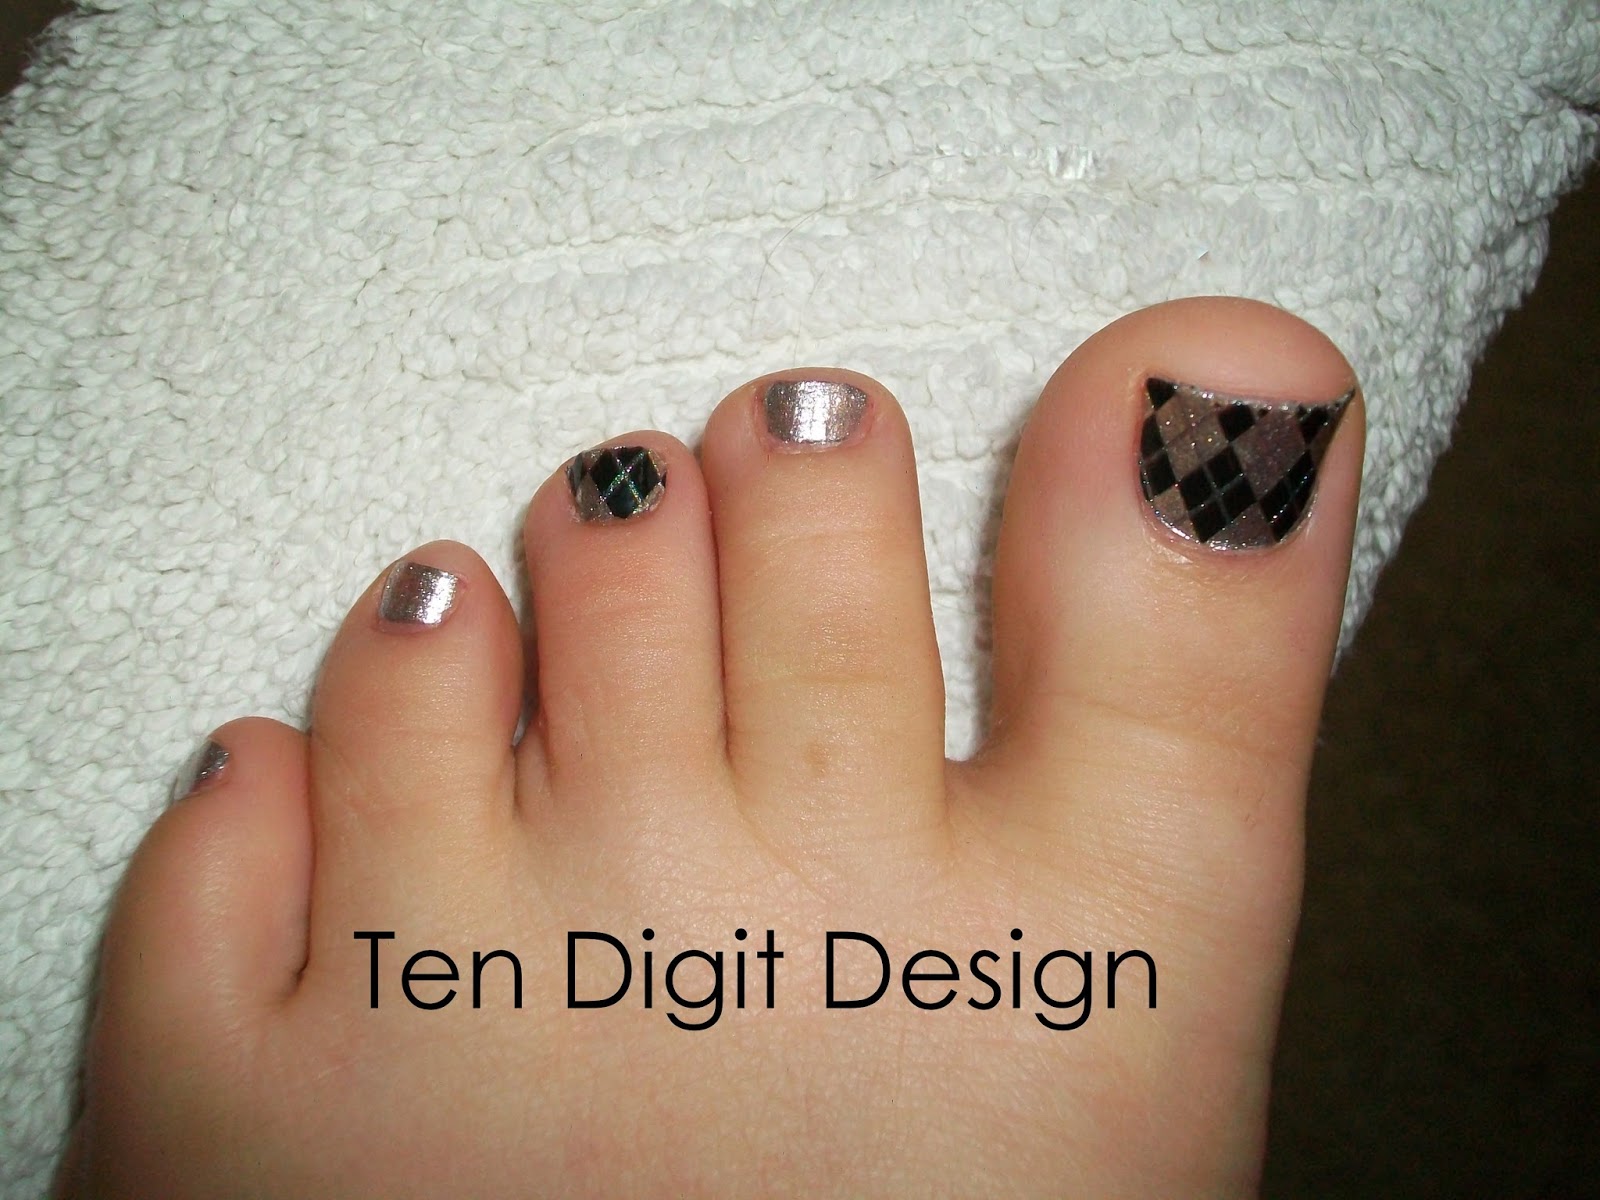
I purchased my box of these at a "Five Below" for only $3!  They're usually between $8 and $10.  I have short nails, so I was able to cut each nail polish strip in half.  The entire box came with sixteen strips (two packets of eight), but I used only eight of them.  After you open a packet of the nail polish strips, you cannot save the rest because they will dry out and become useless.  So, to avoid wasting them, I put some on my toenails too:


The silver polish that I used was Metal Head by Icing.  The whole process of applying the strips to my fingernails took around a half hour.  If you are experienced in using these, that time could probably be much shorter.

I applied a coat of Sally Hansen Dries Instantly on top to ensure that they last for a decent amount of time.  If you have any questions about these, just comment in the comment box below!