Showing posts with label Essie Wicked. Show all posts

Wednesday, October 29, 2014

Houndstooth Halloween


So, as promised, here is my Halloween post!  I actually did a manicure four days ago and then decided to add to it.  Here's what I applied four days ago:

sally hansen salon effects check it out

These are Sally Hansen Salon Effects Real Nail Polish Strips.  The pattern is "Check It Out," which is just a houndstooth pattern.  The strips have held up super well over the past few days.  The trick with these is to make absolutely certain that you do not put them too close to your cuticles and that you run the smooth side of the nail file thing that comes with them all over the surface of the strips to make sure they are secured to your nails.  If bits near your cuticles are sticking up, they will continue to stick up more when they dry.  Then they will start flaking off.  

This time I was super careful and they have not been peeling up!  I actually only used one set (instead of both sets that come in a package) because my nails are small and I can cut them in half and use the excess on my nails on my opposite hand.  You cannot save extra strips because they dry out and are then useless.  So, if your nails are small enough, you can get two manicures out of one package!  

sally hansen salon effects check it out


So, anyway, I applied these to my bare nails and then finished them off with two coats of Sally Hansen Dries Instantly.  I wrapped the tips to try to make them last longer.  ("Wrapping the tips" just means running the nail polish brush along the free edge of your nails to seal everything in.)

So, on to the Halloween part!  I decided to use two techniques that I had never used before.  I first used the dry brush technique to rough up the look of the houndstooth.  This means that I made sure that the nail polish brush had almost nothing on it before streaking it over my nails.  You can see what I mean here:

houndstooth halloween nails

I first used Sinful Colors Snow Me White and then applied some Sinful Colors Black on Black.  After this, I taped up my fingers (as you can see above) so I wouldn't make as much of a mess on my hands.  I used the blood spatter technique (which I have been wanting to do ever since The Nailasaurus did her "Dexter" nails: http://www.thenailasaurus.com/2013/09/31DC2013-dexter-splatter-nail-art.html)

I took a regular straw and two different shades of red.  Here is my straw before and after:


I put down a paper towel to make sure I didn't get paint anywhere and then took my first red polish (Rimmel Burgundy Flirt) and used the brush from it to paint a glob onto the end of half of a straw.  I then would position the straw a few inches above my nail and blow out hard.  It was quite difficult and I figured out why.  That polish was rather thick.  The thicker the polish, the harder it is to do this.   I ended up sticking the actual straw into the bottle of polish to make sure I got a lot in it.  I managed to get some spatters on my nails with this polish, but I then used another red (Essie Wicked--a very dark red) and the other section of my straw to add to the spatters.

This polish was thinner, so was much easier to blow.  I just used the nail polish brush to apply some polish to the end.  If you try this and are having a hard time, it could be because of the thickness of your polish.  

If I were to do this again, I would not have added any extra black on my base.  the black makes it harder to see the red.  Also, I would prefer to do it over a white base.  I want to try that some time.  White would make the red really stand out.  I removed the tape on my fingers and used acetone and Q-tips and a nail art brush to clean up everything.  Cleanup took a while.  I then applied two coats of Sally Hansen Dries Instantly.

 So, without further ado, here is my finished product:

houndstooth halloween nails

houndstooth halloween nails

grungy blood spatter nails

grungy blood spatter nails

grungy blood spatter nails


Happy Halloween!

Monday, March 31, 2014

Earthy with Triangles

Okay guys, I am sure you can notice that I am not the most creative person when it comes to titles.  I am the same way with college essays.  Haha!  So, I actually have a few manicures piled up so I can blog even when I am too busy to paint my nails, which hasn't really been happening lately. =)  I was planning on posting this one later, but I love it so much and am super excited about it.  I currently have this on my nails:


I started out with a base coat of Sally Hansen Double Duty.  I then painted two coats of each color onto my nails.  On my ring fingers and thumbs I used Essie Mink Muffs; on my pointers I used Sally Hansen Espresso; Essie Da Bush (I LOVE that name!) on my middle fingers; and Essie Borrowed & Blue on my pinkies.  I love earthy color combinations.  Color combinations can really make a manicure interesting, even if the designs aren't too complicated.  I really like simple, striking manicures.

After putting on all of my colors, I applied a coat of Seche Vite so the tape wouldn't pull up my color.  For the little triangles at my cuticles, I used Essie Wicked (one of my favorite polishes.)  To create the triangles, I took two thin strips of scotch tape and overlapped the ends so they formed a narrow "V" shape.  I then put the hollow of the "V" where I wanted the dark red triangles to be.  Once I painted on my color, I quickly removed the tape.  To finish off the manicure, I applied two coats of Sally Hansen Dries Instantly.  There are a lot of bubbles in the manicure because I need a new bottle of Dries Instantly.  Mine is really thick and gloopy.  It is too bad that you can only use half of the bottle before throwing it out.  I am loving the length of my nails at the moment.  I can't have them too long because then they drive me crazy.  I have been putting up with them well this time, though.  =)   I hope you like this manicure!  


Thursday, March 27, 2014

Maroon Paisley

This didn't turn out as neatly as I had wanted, but I still like the effect:


I started out with a base coat of Sally Hansen Double Duty.  Then I applied two coats of Rimmel Caramel Cupcake.  After that, I stamped on the paisley pattern from Bundle Monster's plate BM-315 with Essie Wicked as my color.  I made sure to not stamp on the paint the same on each nail because I wanted the paisley designs to be facing different ways.  It smudged a little when I stamped, but it looks okay, I think.  I then applied a coat of Sally Hansen Dries Instantly and then a coat of NYC Matte Me Crazy for the matte effect.

If any of you have any suggestions or comments for me, feel free to leave a comment!  I would love to hear from you!  Suggestions on ways to make this blog more interesting to you would be greatly appreciated!  And any time you have nail art ideas or questions, leave a comment!  =)  

Thursday, December 19, 2013

Christmas Wreaths

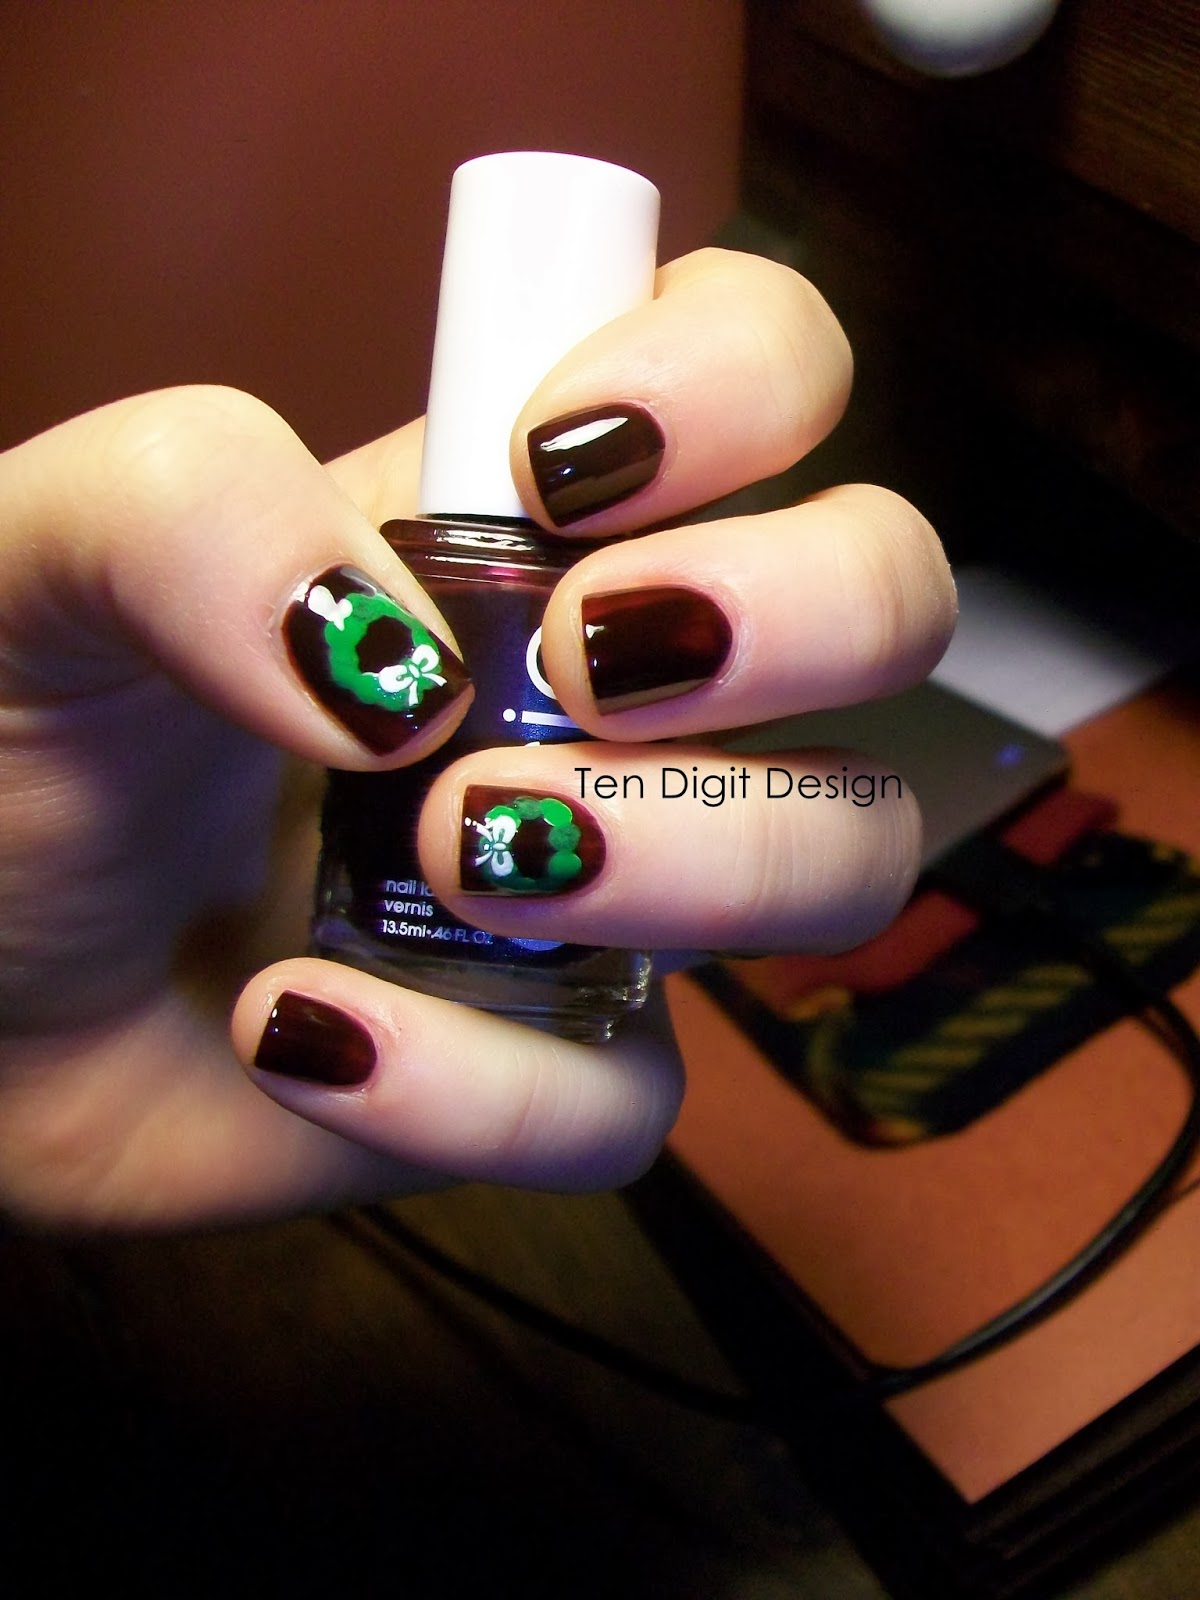
I have been looking forward to painting my nails with wreaths on them:


My base color is Essie Wicked, one of my all time favorite nail polish colors.  I used two coats of that.  Then I used a dotting tool and made rings of white dots to make the wreaths.  The reason I used white is because colors show up better on a white base.  I then dotted the color over the dry white dots.  Originally I made dark green and light green alternating dots, but, even with the white background, the dark green did not show up well against the dark red.  So, I went back over the dark green with the light green which is NYC High Line Green.  When all that was dry I applied some bow nail stickers and then put two coats of Sally Hansen Dries Instantly over everything.

Thursday, September 5, 2013

Simple Silver Curve

I've been super busy with starting another year of college, but I actually did this nail art a couple days ago:


I painted my nails with Essie Wicked, one of my all time favorite nail polish colors, and then I made a curved stripe with Salon Perfect Silver Plated, a polish with a striping brush.  The lines didn't come out as well as I would have liked, but the thumb came out the best.  I used Sally Hansen Dries Instantly overtop.  It looks fancy-ish, at least.  

I just made a few new purchases from Born Pretty Store.  That is a great website.  I highly recommend it!  You need to make an account with them to shop there, but that's totally worth it.  Their prices are super and they sell all manner of nail art equipment and more!  All shipping is free!  Depending on where you live, items can take a very long time to reach you.  What I just ordered came from Hong Kong, so it took at least a couple weeks to reach me.  I ordered some 1.5 mm half pearls and some pink 2 mm studs.  I am so excited to use them!