Showing posts with label NYC High Line Green. Show all posts

Wednesday, June 18, 2014

Techie Nails!

I am excited about this manicure! I knew I would get back into the mode soon enough! I have been wanting to use the binary code image from one of my stamping plates since I got them a while ago!
I used so many polishes for this manicure! I started out with a base coat of Essie Protein Base Coat. I used two coats of all of my base colors. On my thumbs I painted NYC High Line Green; on my pointers I did a gradient, but my base color was Revlon Dreamer; on my middle and ring fingers I painted Sally Hansen Black Out; and on my pinkies I painted Sally Hansen Celeb City. After that, I got ready to do a gradient on my pointers by applying a coat of Sally Hansen Dries Instantly so I could avoid removing my base color with the sponge. I then got down to stamping on my other nails. On my pinkies I used Bundle Monster plate BM-422. The polish I stamped with was Sally Hansen Black Out. On my ring and middle fingers I used Bundle Monster plate BM-415. I stamped with Sally Hansen White On. On my thumbs I used plate BM415 again and used Essie Penny Talk. On those nails I then applied two coats of Dries Instantly.
For the pointers I created a gradient. I wanted it to be light in the centers and fade into darker blue at the tips and near my cuticles. So, I applied a stripe of Revlon Dreamer in the center of a makeup sponge, and then put stripes of Sinful Colors Rain Storm on either side of that line, and then put stripes of Sally Hansen Thinking of Blue on either sides of those lines. I then used a stippling motion to apply it to my pointer nails. When that was dry, I used Essie Borrowed & Blue and the same image I used on my pinkies (from BM-422). I finished those nails off with two coats of Dries Instantly, as well.

Thursday, March 13, 2014

Shamrocks!

I wanted to get on the bandwagon and make some Saint Patty's Day nail art.  My right hand came out better than my left hand this time, so I have included a picture of each hand:


I started out with a base coat of Sally Hansen Double Duty.  Then I applied two coats of Revlon Rain Forest.  When that was dry, I carefully painted on a coat of Nicole Glitter in my Stocking so that some green near my cuticles was left uncovered.  I had never done this before, but this was surprisingly easy to do!  I think it depends on how thick or thin the polish you are putting on top is, and what the brush of the top polish is like.  This glitter is thick, so it didn't run anywhere, and the brush is pretty good.

For the shamrocks, I used NYC High Line Green.  I used a dotting tool to make three hearts into the shape of a shamrock.  I got better at the technique and placement by the time I put them on my right hand with my left hand (which is my non-dominant hand), so that it why I included a picture of both.  The way I made these was by dragging the dotting tool lightly for each stroke, so it took me two strokes to make each heart shape.  I finished this manicure off with two coats of Sally Hansen Dries Instantly.  The glitter is scratchy, so I also wrapped the tips, which means that I glided the top coat over the very tips of my nails.  
Happy Saint Patty's Day to anybody who celebrates it!  I don't do much for the holiday, but I will probably have some corned beef, cabbage, and Irish soda bread.   =)


Monday, February 17, 2014

Tricolor Gradient

Last night I was looking at my Olay Fresh Effects facial cleanser and I realized how much I liked the colors on the bottle.  So, I decided to recreate those colors on my nails by sponging on a gradient:


I started out with a base coat of Sally Hansen Double Duty.  I then applied two coats of Sally Hansen Hard To Get, a white polish (which I would not recommend, by the way.)  When that was dry, I applied one coat of Sally Hansen Dries Instantly so the sponge wouldn't pick up my base color as I stippled on the gradient.  When that was all dry, I took a triangular makeup sponge and put three lines of polish of different colors on the end.  I put a stripe of Avon Sunshine (a yellow), NYC High Line Green, and Essie Go Overboard (the teal) slightly overlapping each other on the sponge.  Then I started stippling that on to all of my nails, placing the yellow side at the base of my nails.  After every couple nails I applied more polish to the sponge.  After doing all of this, I cleaned up around my nails with a Q-tip dipped in acetone.  This was a challenge to clean up and it took a while.  To finish off the manicure, I applied two coats of Dries Instantly.

Thursday, December 19, 2013

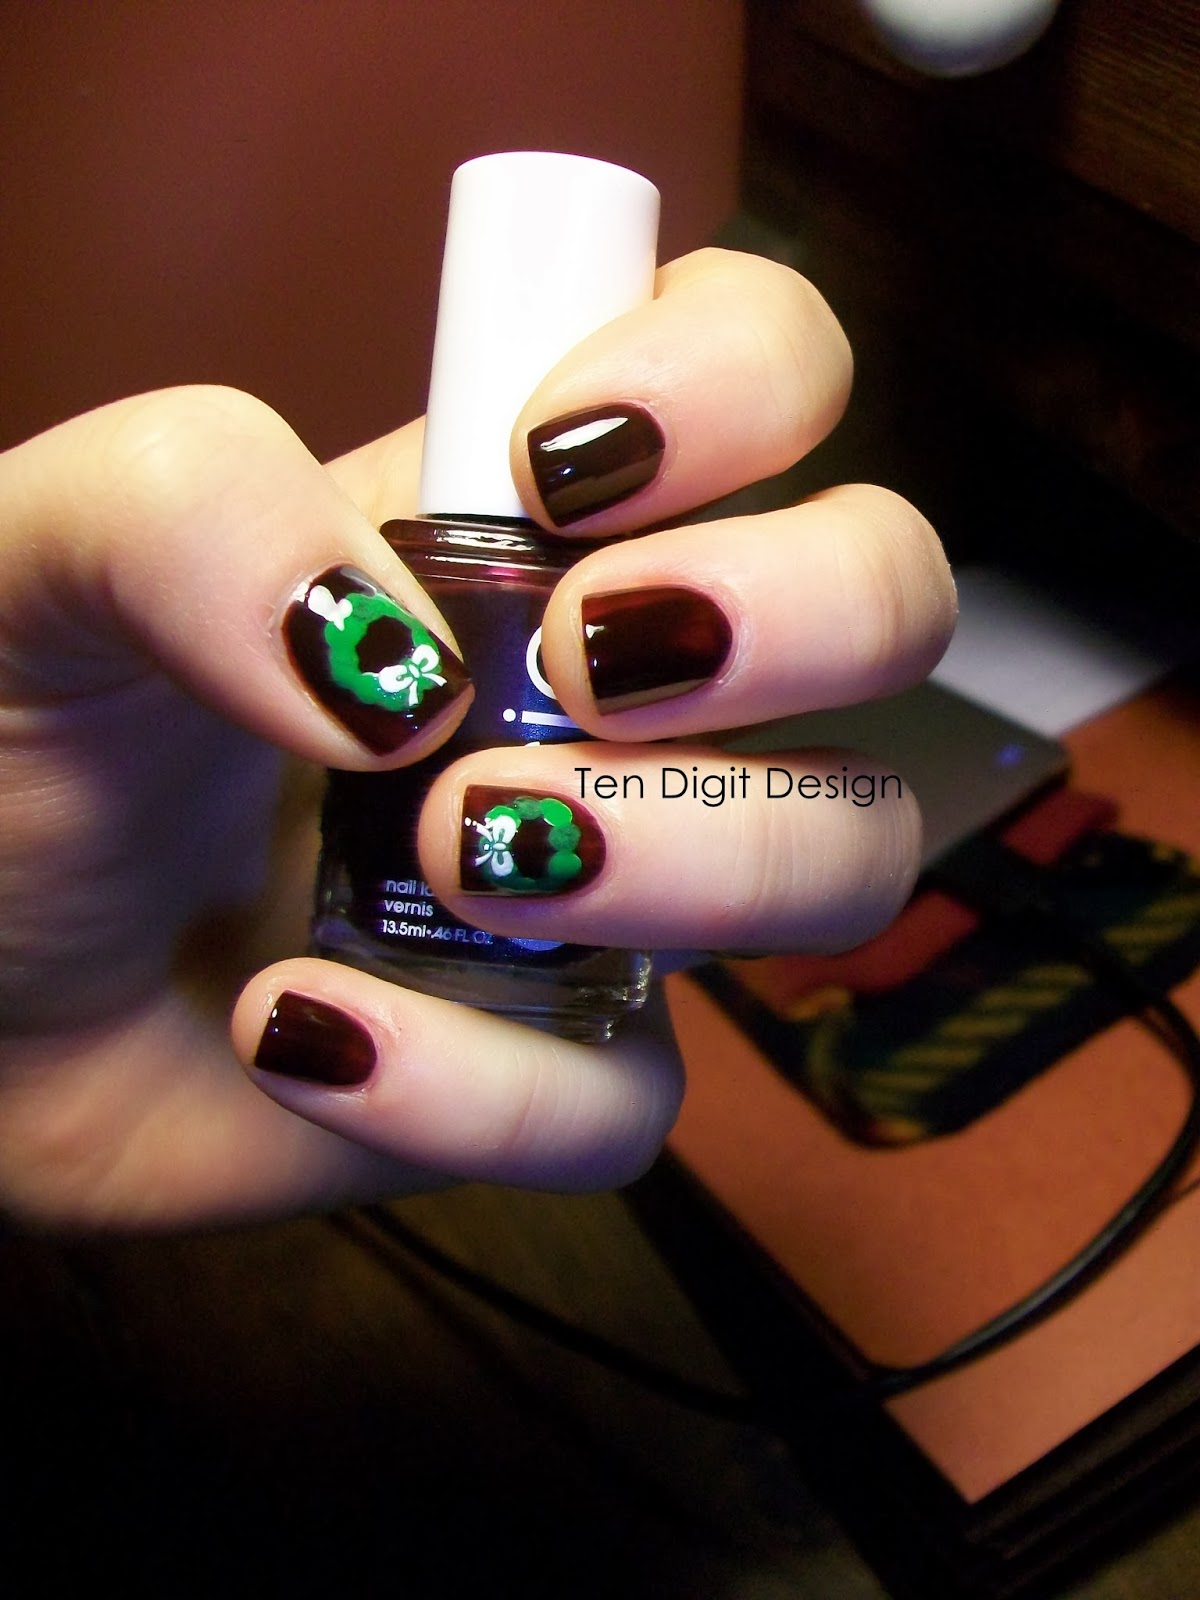
Christmas Wreaths

I have been looking forward to painting my nails with wreaths on them:


My base color is Essie Wicked, one of my all time favorite nail polish colors.  I used two coats of that.  Then I used a dotting tool and made rings of white dots to make the wreaths.  The reason I used white is because colors show up better on a white base.  I then dotted the color over the dry white dots.  Originally I made dark green and light green alternating dots, but, even with the white background, the dark green did not show up well against the dark red.  So, I went back over the dark green with the light green which is NYC High Line Green.  When all that was dry I applied some bow nail stickers and then put two coats of Sally Hansen Dries Instantly over everything.