Tuesday, June 23, 2015

Asia Inspired


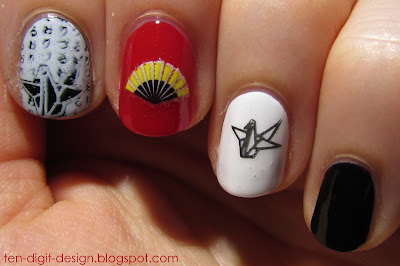
So, I had nail stickers and a stamping plate that were Asian themed, so I decided to put them to good use and do an Asian themed mani!  I am really liking how it turned out!

asian themed nail art

I started out with a coat of OPI Natural Nail Base Coat.  I then applied two coats of each base color.  I used Sinful Colors Snow Me White on my thumbs and ring fingers; Sinful Colors Black on Black on my pointers and pinkies; and Sinful Colors Gogo Girl on my middle fingers.

asian inspired manicure

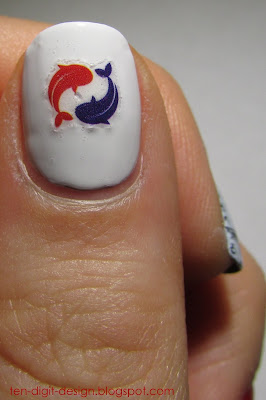
I then applied nail stickers to my thumb and middle fingernails.  I stamped my pointer and ring fingers with Bundle Monster's plate BM-405.  I used an old black and an old white polish to do this.  The thicker the polish, the better it will be for stamping.  So, don't throw out your gloopy polishes!  They may be good for stamping!

asian inspired manicure

I finished off with two coats of Sally Hansen Dries Instantly.

Friday, June 19, 2015

Classic French Tips

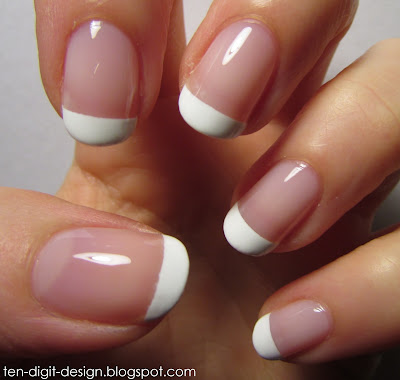
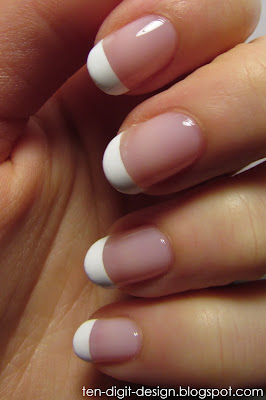
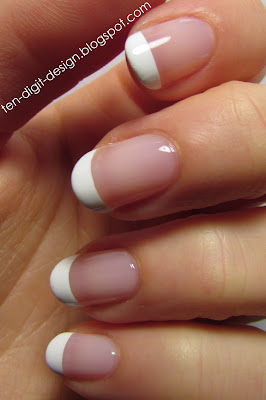
A manicure that is sure to go with absolutely anything is the french tip.  I absolutely love french tip manicures.  They are so classy and elegant.  Whenever I have a french tip mani, I can't stop looking at my nails.  A while ago I did a basic french tip manicure on my nails.  French tip manicures can also be spruced up with different colors, glitter, rhinestones, studs, and whatever else you want!  Here's my version of a classic french tip:

french tips

I started out with a coat of OPI Natural Nail Base Coat and then applied two coats of Pure Ice Satin Ribbon, a very light pink sheer polish (the typical pink used in french manicures).  I then applied a coat of Sally Hansen Dries Instantly because I planned on using french tip guide stickers to create perfect tips (you can also use striping tape, scotch tape, any other type of tape, or just do it freehand).  

french tips

I applied my french tip guides and then used Sinful Colors Snow Me White for the french tips.  I removed the tape right away and then applied two coats of Sally Hansen Dries Instantly.

french tips

Here's something interesting:  I have read that the french tip is actually American.  A Hollywood makeup artist invented it because it went with any outfit a woman would be changing into.

french tips


Sunday, June 14, 2015

Spring Gradient

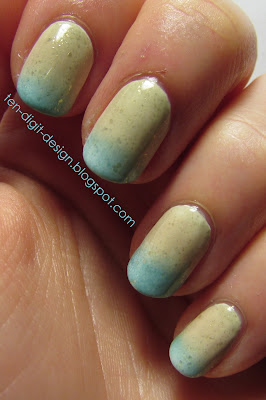
I actually did this manicure months and months ago.  It's about time to post it.

gradient manicure

My cuticles were not in tip top shape here!  Haha!  The great thing about humid weather (like the kind of weather we are having now in the almost summer of the north east of the USA) is that is allows your cuticles to stay much nicer.

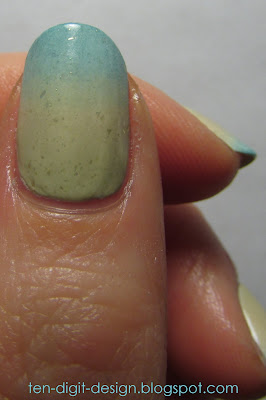
I started out with a coat of Essie Protein Base Coat (which I will never go back to after OPT's base coat) and then applied two coats of a white polish.  I then applied a coat of Sally Hansen Dries Instantly to prevent my base color being pulled up by my sponge.

gradient manicure

To the makeup sponge, I applied a stripe of L'Oreal Now You Sea Me, Pure Ice Shore Bet (a tan), and then a stripe of Essie Da Bush (an earthy green).  I stippled this onto my nails so the blue (Now You Sea Me) was at the tips of my nails.  I finished off with a coat of Essie As Gold as It Gets, which is flakes of glitter.  It is really not as exciting as it sounds.  You can see that it is barely gold at all.  I finished off the whole manicure with two coats of Sally Hansen Dries Instantly.

gradient manicure

Friday, June 12, 2015

Captain Janeway Nails!!!

I literally JUST did this manicure!  I am so so so excited and I couldn't wait to show you guys!  I've been thinking about doing a manicure like this for over a year.  Today I was suddenly inspired to just do it.  Here it is:

captain janeway manicure

I have been a Trekkie since I was 16 years old.  I started out by watching all of The Original Series, and then I watched all of Voyager.  I have watched almost all of Deep Space Nine, and I have watched some of The Next Generation.  I don't like Enterprise.  Sorry.  I have also seen all of TOS movies.  So, I love Star Trek.  Out of all the captains, I have to say Captain Janeway is my favorite.  She is such a great feminist role model!  She is so strong, and she is very compassionate.  I just love her.  Okay.  Anyway, here's how I did this:

I started out with a coat of OPI Natural Nail Base Coat, and then applied two coats of Revlon Forbidden on all my nails.  This is a beautiful blood red.  I only did art on my left hand's thumb and ring finger, so after the red was dry, I applied two coats of Sally Hansen Dries Instantly on all my nails, except for the thumb and ring finger of my left hand.  I applied only one coat to the ring finger because I was going to use striping tape.  I did not apply any to the thumb.  

captain janeway manicure

I used gold and silver metallic Sharpie markers to draw on the Star Trek communicator badge on my left thumb.  I drew the gold part first, and then drew the silver part over top.  This was my first time using metallic Sharpies on my nails.  I have seen a lot of other people do this.  It worked really well.  Just make sure your base color is completely dry so you don't put dents in it.  I made the mistake of being impatient, but the top coat smoothed everything out a bit.  Also, be careful when applying top coat.  Mine smudged and then I had to use a small nail art brush dipped in the red to clean up the edges.

captain janeway manicure

So, all about the ring finger:

After my one coat of Sally Hansen Dries Instantly was all dry, I applied a piece of striping tape half way down the nail and then filled in the lower half (near the tip) with Sinful Colors Black on Black.  When that was dry, I took acrylic paint (I mixed the color.  I used a gray and a teeny bit of navy blue to make the slate gray color) and a tiny detail brush and painted on the shape of the undershirt.  I then took my Sharpies and drew on the communicator badge.  

When the gray acrylic was dry, I mixed up some tan (also acrylic) for Janeway's skin.  I mixed an ivory color with a teeny bit of reddish brown.  I then painted it over top of the gray in the shape of a half moon.  

captain janeway manicure

Lastly, I applied four bronze microbeads on the "collar" for Janeway's rank insignia.  I finished those two nails off with two coats of Dries Instantly.

captain janeway manicure

I had a bit of a catastrophe while applying my top coat.  I accidentally smudged the communicator badge and the acrylic paints with the top coat.  I remained calm.  I just waited for the top coat to dry and then used my teeny nail art brush to paint over the smudges.  You can't really tell anything happened.  JUST KEEP CALM!  YOU CAN SALVAGE ALMOST ANY MANICURE!  Haha! 

I hope you liked this post!  Remember to follow me on Instagram at popstermargie and Snapchat at margie-jane.  You can also like Ten Digit Design on Facebook and follow my Ten Digit Design Pinterest board from my Maggie Victoria profile.

Thursday, June 11, 2015

Negative Space Stripes Re-Creation


Before anything else, I want to tell you that this manicure is inspired by a picture I saw online.  This is not original.  I saw a picture by So Nailicious and loved how her mani looked!  Check her out at sonailicious.com!  Here is the link so you can go right to her tutorial on how she achieved the look:
http://sonailicious.com/negative-space-nautical-nails-tutorial/

Okay!  On to my version of it!

negative space manicure

I started out with a coat of OPI Natural Nail Base Coat.  I then applied a coat of Sally Hansen Dries Instantly because I planned on sticking striping tape on next.  I didn't want the tape to lift up my base coat, and you cannot use Sally Hansen Dries Instantly as a base coat.  The formula does not stay put on your nails.  I learned from experience when I used it as a base coat and then my entire manicure peeled off in only a day.

negative space manicure

I applied striping tape where I wanted my natural nails to be visible.  I then dripped small puddles of nail polish onto a piece of scrap paper and took small nail art brushes to fill in the stripes between pieces of tape.  I worked as fast as I could so the polish wouldn't dry too much before I removed the tape.  I used the brush from the bottle of polish to paint on the tips.  It was easier that way.

negative space manicure

The colors I used are as follows:

Peach:  Essie Haute as Hello
Gray:  Sinful Colors Cool Gray
Teal:  L'Oreal Now You Sea Me

After finishing a nail, I removed the tape as soon as possible.  I finished everything off with two coats of Dries Instantly.  I got bored of doing this, so I painted my right hand with solid colors (the same I used for the stripes.)  I actually like how it looks to have both my hands a bit different, but still color coordinated!  Oh!  One last thing:  If you get any polish where it is not supposed to be, just use a small brush and acetone to neaten it up.  I had to do a lot of neatening up before taking these pictures!

Follow me on Instagram at popstermargie

Monday, June 8, 2015

Tan to Rosy


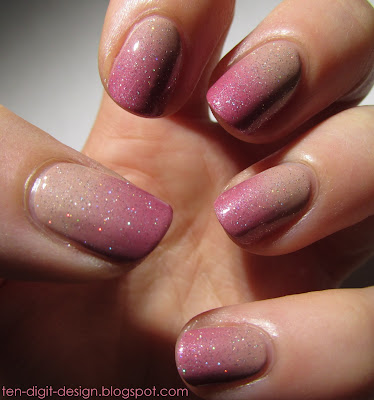
This is one of my favorite manicures!  I loved how feminine and pretty it is!

tan to rose gradient manicure

I started out with a coat of OPI Natural Nail Base Coat.  Then I applied two coats of Rimmel Caramel Cupcake, a tan polish.  I painted on one coat of Sally Hansen Dries Instantly after this so the sponge I planned on doing the gradient with wouldn't pull up my base color.

tan to rose gradient manicure

I then took a triangular makeup sponge and applied a stripe of Caramel Cupcake and a stripe of Sally Hansen Rockin' Hard onto the sponge.  I made the colors overlap a bit.  I then stippled that onto my nails.  I made sure to stipple quite a lot so the colors would blend.  I applied more polish to the sponge whenever I needed to.  

I immediately applied a coat of Salon perfect Cosmic Dust , a very fine holographic glitter which is absolutely mesmerizing in the sunlight, once I was done with all the sponging.  I finished off with two coats of Sally Hansen Dries Instantly.

tan to rose gradient manicure

I got Instagram today!  You can follow me!  My username is popstermargie
https://instagram.com/popstermargie/

Wednesday, June 3, 2015

Purple and Green Water Marbling


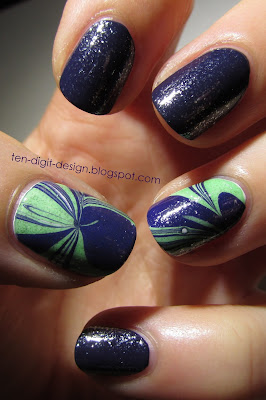
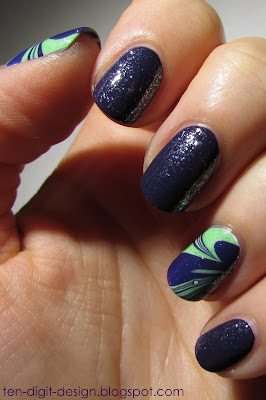
Hello again!  I am getting back into the nail art game!  I am planning on doing my cousin's nails for her confirmation.  I can't wait!  Anyway, I did my own nails yesterday.  I decided to do some water marbling.  The more you try this method, the better you get. Yesterday was my fifth time water marbling.

water marbling manicure

I started out with a coat of OPI Natural Nail Base Coat.  I then painted two coats of Sinful Colors Snow Me White on my ring fingers and thumbs.  I planned on water marbling only these fingers.  It is best to water marble over a white or a light polish so the water marbling colors will pop.  I painted two coats of Essie No More Film on the rest of my nails.

water marbling manicure

I then took masking tape and applied it all around my nails and about half way up the fingers that I was going to water marble.  This significantly reduces the amount of clean up you need to do after water marbling.  I suggest using masking tape because it is more flexible and easier to apply all around your nails.  It is also easier to remove because it sticks to itself a little less and doesn't peel into small strips, like scotch tape does.

water marbling manicure

I then started water marbling.  I used Essie No More Film and Essie Mojito Madness.  These were great polishes to use because the consistency was just right.  They spread out across the water very nicely.  If a polish is too thick, it will not spread out well.  Also, the water I used was a teeny bit warmer than room temperature.  Room temperature water is what you are supposed to use while water marbling.  The very slightly warmer water worked fine, though.

water marbling manicure

After dropping alternating drips of these two polishes onto the water, I took a toothpick and dragged it from the outer edge of the polish floating on the water into the center to create a clover shape.  I kept doing this until I saw something that I wanted on my nails.  Then I dipped the nail into the polish at the point that I wanted on my nails.  I left the nail submerged and gently blew onto the surface of the water to dry the excess polish.  I then took a toothpick and swirled it through the water to collect the excess polish.  After, I removed my finger from the water, removed the tape with small scissors and tweezers, and used acetone to clean up any polish that got onto my skin.  

I finished off with a coat of Sally Hansen Diamonds, a fine, iridescent glitter, on all of my nails, and then two coats of Sally Hansen Dries Instantly.

Monday, June 1, 2015

Checkers and Microbeads


Hi!  It's been so long since I have blogged!  Since I blogged last I have graduated with an associate's degree in childhood education.  I have been really busy with stuff.  I finally got around to doing my nails yesterday!  I am happy with how they turned out!  
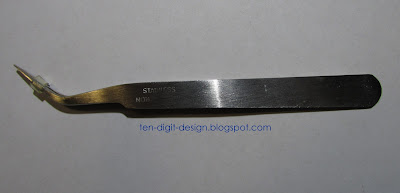
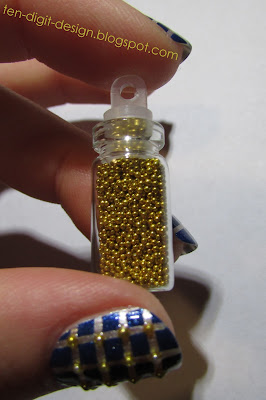
Before I go in to the manicure, I just want to show you a couple cool things!  I got a great pair of tweezers from Amazon that are great for manicures!  I also got microbeads, tiny metallic balls that can be used for caviar nails and other nail looks:

nail art tweezers

microbeads

Okay, on to the manicure!

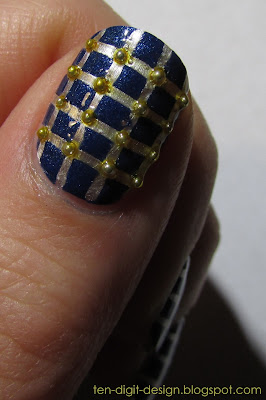
checker and microbead manicure

I started out with a coat of OPI Natural Nail Base Coat.  (This base coat is GREAT!  It keeps staining to a minimum.  This is definitely the best base coat I have ever tried!)  I then started cutting pieces of striping tape.  I used 62 pieces in all.  

I then applied two coats of Essie Oui Madame and then a coat of Sally Hansen Dries Instantly to avoid the tape pulling up my base color.  I then began applying the striping tape.  I used my curved tweezers to do that.  It is best to not touch your nails when you are doing them as the oil from your skin can shorten the life of your mani.  I made sure I remembered the order in which I applied the striping tape.  I applied the horizontal stripes first, so when I removed the tape I made sure I removed the vertical tape first.  You remove striping tape in the opposite order from how you applied it

checker and microbead manicure

So, anyway, I applied all the tape and then painted over top of it.  I used Milani Sail Away.  I immediately removed the tape with tweezers after painting each nail.  I then took gold microbeads and applied them at the intersections of the criss-crosses on my thumbs and ring fingers.  I used clear nail polish and a dotting tool to do this.  

checker and microbead manicure

I finished off with two coats of Sally Hansen Dries Instantly.  The top coat made the color on the microbeads bleed off a bit, as you can probably notice.  The microbeads feel quite scratchy!  

checker and microbead manicure