Saturday, September 27, 2014

Perfect Polka Dots and Chevrons!

Hello!  Once again, it took me forever to blog!  I am now around 1/4 of the way through this semester! It has been crazy!  Happy fall!  Fall is my favorite season!

Before starting this manicure I searched "how to polka dot nails" on Google and found this picture:


I have always struggled with getting even polka dots on my nails, but following these steps made it super easy!  My other trick is to make sure you use a small dotting tool instead of a larger one.  I used one that was smaller than I thought I wanted, but the dots turned out much better this way!


I started out applying a coat of Essie Protein Base Coat to all of my nails.  I then painted on two coats of Sinful Colors Snow Me White.  Once that was dry, I took my small dotting tool and Sinful Colors Black on Black and followed that picture tutorial to create perfect polka dots on my pointer, pinkie, and thumb nails (and all of my nails on the other hand.)


I then waited for that to dry and put one coat of Sally Hansen Dries Instantly on my middle and ring fingernails so the chevron tape I was going to use wouldn't pull up my base color.  I then applied three strips of chevron tape to those nails and painted a coat of Sinful Colors Black on Black over top.  I then immediately removed the tape and was left with perfect chevron stripes.  I painted a coat of Salon Perfect Cosmic Dust (a fine, holographic glitter which I LOVE) over all of my nails once everything was dry.  I finished off with two coats of Sally Hansen Dries Instantly.

  
Something I am really loving about having rounded nail tips is that my manicures last longer!  When I had squared tips, the polish would chip off of the corners in a couple days.  My nails are weak, so the corners of my nails would also often break off.  The rounded shape is really working out for me!  Don't be afraid to experiment with different lengths and shapes!  You can always trim your nails shorter, grow them out again, or reshape them!!  The change you make to them will not be permanent!

Friday, September 19, 2014

Vintage Half Moon Mani!!!!

Hi Guys!  Once again, I went FOREVER without blogging.  I am now 1/5 of the way through this semester.  Haha!  Counting down the days!  I did a manicure last week and haven't posted it yet, but I did another manicure today and I am so so so excited about how it came out!  I rounded my nail tips today and then decided to do a manicure that looks better with rounded tips!  I remembered how much I had always wanted to create a vintage half moon mani!  So, I did it!  Here it is:


So, half moon manicures are actually from the 1930s and '40s!  I LOVE vintage stuff!  I have many more pictures of my manicure down below.  I was just so super excited about how it came out!  Here is an old advertisement for nail polish:


Now, on to the tutorial!

I started out with a base coat of Essie Protein Base Coat (this really keeps my nails from staining).  I then painted on two coats of Essie Oui Madame (I LOVE that name!  It is a sheer, pearly color) on all of my nails.  After that was dry I painted on a coat of Sally Hansen Dries Instantly so the tape wouldn't pull up my base color.  

Another thing you can do as a precaution before applying tape (that you are planning to remove) is to stick the tape to the back of your hand to take off a little of the stickiness.  I applied half of a hole reinforcement to each of my nails near the cuticle and a french tip guide (you can use a curved or straight strip of tape too) to each of my nail tips.  I made them cover the entire tip of my nail without leaving any nail showing beyond them because I wanted to keep the entire tips the white color.  

Don't apply these like you would if you were going to paint French tips on your nails (unless you have really long nails).  It is easy to do that because of being so used to applying them that way.  You want to cover the whole tip.

I then painted on a coat of Rimmel Stiletto Red in between the two pieces of tape on each nail.  As soon as I painted each nail, I quickly removed the tape.  I cleaned up the sides of my nail beds with a nail art brush dipped in acetone.  If any red polish went under the tape I took the brush dipped in acetone and lightly dabbed at the messy edges to remove the teeny jagged bits of red polish.  Just don't dab the brush too many times in one spot or your base color might come off too.  I finished off the manicure with two coats of Dries Instantly.

I have this really old makeup kit that I found in my grandma's antique shop.  I decided to use this as a prop for my photos.  Enjoy!


Vintage pics!


Friday, September 12, 2014

Nail Tattoos!


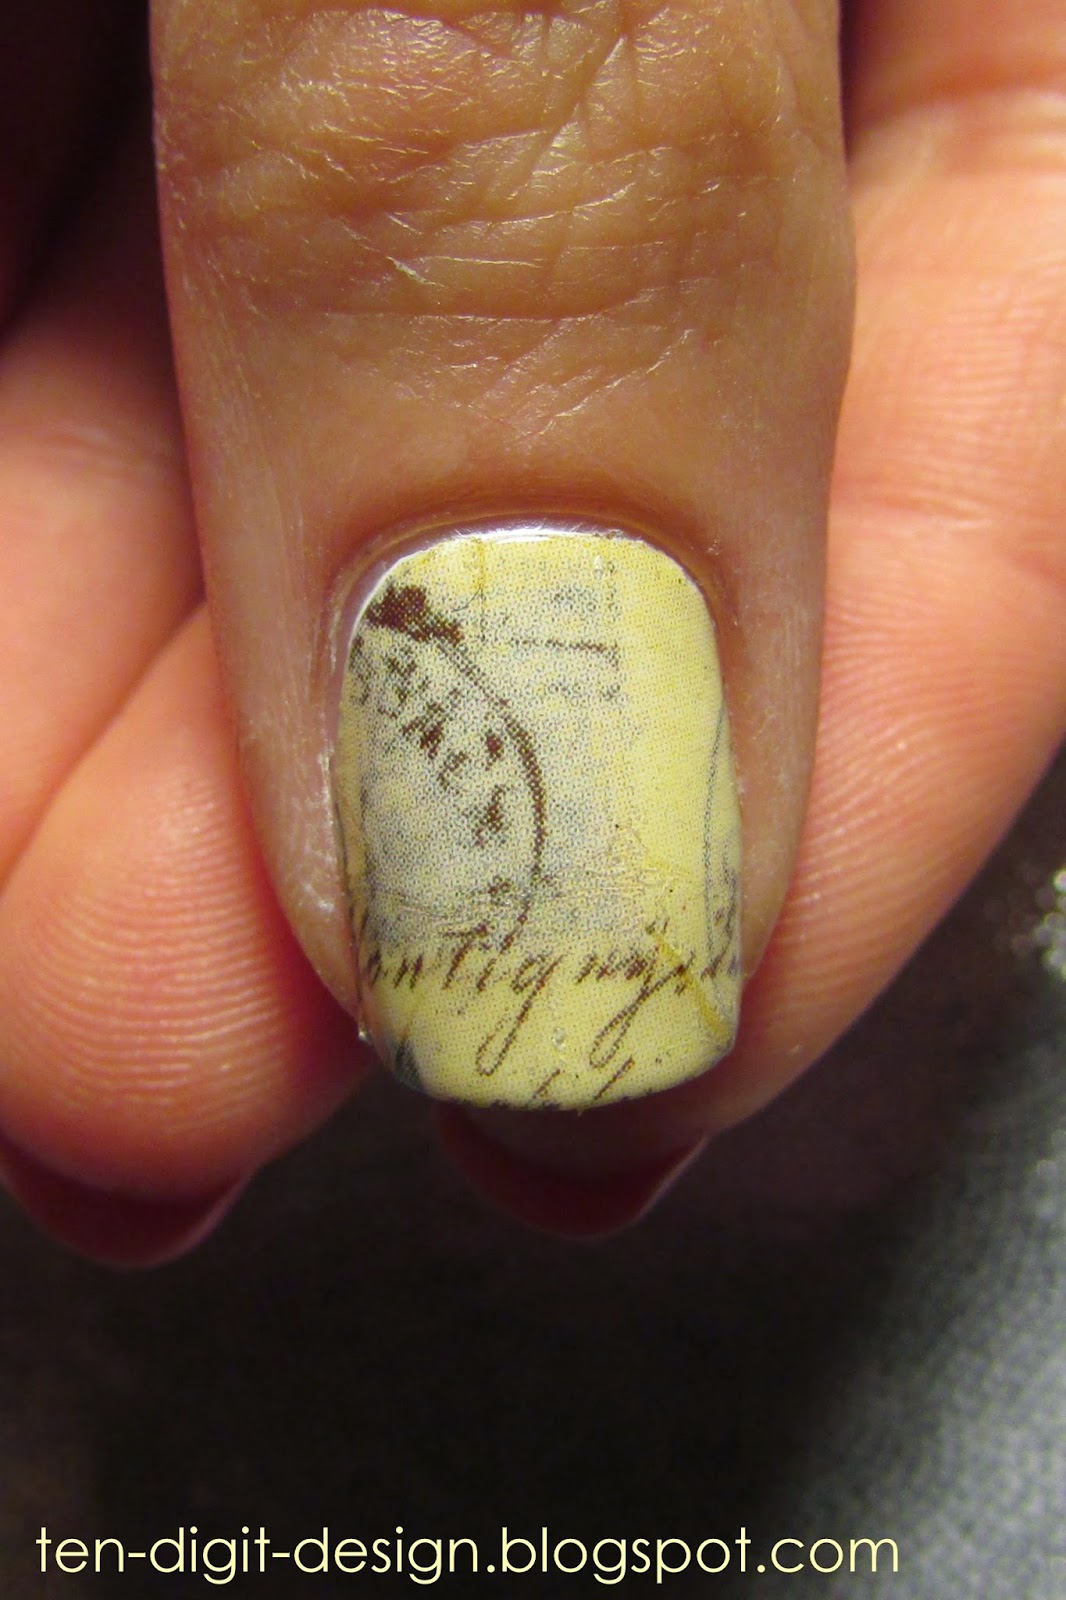
I finally bought some nail tattoos from Walmart!  I have been meaning to try those out for a while and I finally got around to it!  My semester is looking up a little because I dropped a really terrible class, but I am still crazy busy.  I have been able to do my nails around once a week, though.  This is from days ago (I don't even have it on my nails anymore), but I am going to do my nails again tomorrow for my birthday celebration!  I am going to be 20 on Monday!  I can't wait!  And it feels weird saying that I am going to be 20!  Okay, anyway, here is what I came up with days ago:


I started out with a coat of Essie Protein Base Coat and then painted two coats of Sinful Colors Snow Me White on the nails that I would be applying the tattoos to (in this case, my ring finger and thumb), and two coats of Sally Hansen Pink Blink (which I also bought at the same time I bought the nail tattoos) on the other nails.  I then used a dotting tool and top coat to stick the 2 mm gold square studs I got from Born Pretty Store to my pink nails.  I finished those nails off with two coats of Sally Hansen Dries Instantly.

Before applying the tattoos to my nails, I cut out the bits that I wanted on each nail and roughly trimmed the tattoos to the shape of my nails.  I then removed the plastic covering from the tattoo bits and picked one up with tweezers and dipped it into a little glass of water (I used a shot glass because it was a really nice size) and held it in there for a second or two.  I then took the tattoo and placed it face down on my nail and held it there for around ten seconds before easily sliding the paper backing off of my nail, leaving the tattoo behind.


I then smoothed down the tattoo and pressed the loose ends against the sharp tip of my nail so I could carefully removed the excess.  I used an orange stick to carefully break the excess around my cuticles.  I then took a nail art brush dipped in acetone and cleaned up even more.  The tattoos do dissolve in the acetone, but I would suggest taking off larger pieces of excess tattoo first and then using acetone to clean up small edges that you can't reach any other way.  I practiced on my right hand first and using acetone to clean up all of it was messy and sticky.  Also, I would recommend cutting the edge that will go at your cuticle with a curve so you have slightly less clean up to do.

I finished off the tattooed nails with two coats of Dries Instantly, as well.

I am super happy with the nail tattoos!  They were pretty easy to use and they looked so cool!  And they are only a couple dollars at Walmart for a set that comes with around 18 small sheets (by "small" I mean around 1 by 2 inches.)  The brand is "Heart 2 Art," by the way.


Friday, September 5, 2014

Cross Stitch Hearts

Hello!  I have been feeling pretty crazy because I started another semester of college a few days ago and I am already SUPER stressed out!  I do not handle stress that well and I am earning my associate's degree at the end of this school year, so I am just taking the classes that I need to graduate which, sadly, are not at all fun and don't have much to do with my actual major, childhood education.  Well, anyway, here is the manicure that I did a while ago now:


I started out with a coat of Essie Protein Base Coat.  I then painted on two coats of Revlon Pale Cashmere.  When that was dry I used toothpicks to make the "stitches."  I made a heart shape on my ring fingers and thumbs.  This didn't turn out as well as I was hoping, but it looked cute.  The yellow is Avon Sunshine; the light blue is Essie Borrowed & Blue; the reddish color is Rimmel English Rose; and the purple is Rimmel Wild Orchid.  


After everything had dried I used one coat of Sally Hansen Dries Instantly and then one coat of NYC Matte Me Crazy (a matte top coat.)


I do not know how often I will be able to paint my nails this semester, so I am sorry if my posts are infrequent.  Good luck to any of you who have started college or school!  

Oh!  I have linked my Pinterest page to my blog!  You can follow me there if you want!  You can also "like" me on Facebook!

Friday, August 29, 2014

"Sherlock" Nails

Hi!  I have been wanting to do this for a long time and I finally just went for it!  I love the BBC show "Sherlock" because it is super clever and fun!  So, the design I attempted didn't come out as nicely as I was hoping, but from a distance it looks better.  Anyway, here's what I was going for:


This is what my final product was:


Obviously, I had issues creating the design from the wallpaper.  I needed to make it simpler, but it looks messy up close.  I did get a compliment on the nails, though, so I guess I am just scrutinizing them too closely and thinking like a perfectionist.  From a distance they look a bit better.  So, anyway, on to how I created these:

I started out with a coat of Essie Protein Base Coat.  I then painted on two coats of Revlon Pale Cashmere.  This is a GORGEOUS polish!  It is a semi-sheer, light beige polish and it looks so elegant, feminine, and clean.  I would love to wear it alone.  After that dried I took a small detail brush and attempted the wallpaper design with Sally Hansen Black Out.  I used a toothpick to make the little details inside the curved lines.  After all that (which took a maddeningly long time) I used the same detail brush in Avon Sunshine to draw on the spray paint smiley face.  I finished off with two coats of Sally Hansen Dries Instantly.  

If you ever want to create a Sherlock wallpaper design, it would be cool to put a matte top coat on top of everything!  To be honest, I was planning on that, but I really wanted to be done with this manicure, especially since it was not coming out the way I wanted it to.  In the end, though, I am happy with it because it does remind me of "Sherlock" and it looks better when I am not scrutinizing all the details.  


Monday, August 25, 2014

Peachy Triangles

I am back!  I got home from Florida yesterday.  I had a great time!  So, I have been planning this manicure since I was still in Florida and have been super excited to get to do my nails again.  I finally got the chance and I am super happy that my bare nails grew out nicely while I was in Florida.

I started out with a coat of Essie Protein Base Coat and then painted on two coats of Essie Haute as Hello.  That polish takes a long time to dry, for some reason.  I then applied one coat of Sally Hansen Dries Instantly so the tape wouldn't pull up my base color.  

Before starting the manicure I had cut ten squares of scotch tape.  I applied a corner of one to each of my nails so I would be left with peach triangles at the tips after applying my next color.  The polish that I painted over top of everything is Sinful Colors Cool Gray.  This is a very opaque color, so it completely hid the peach.  After painting the gray on each nail I removed the tape.  

After that was all dry I used a silver striper (Salon Perfect Silver Plated) to line the place where the two colors met.  I was planning on doing that all along, but after taping I actually needed to do that to make the manicure look cleaner.  Not all the lines were completely clean, but the silver polish over that hid the messy bits perfectly.  
I finished off with two coats of Dries Instantly.


Saturday, August 16, 2014

About Me!

Hi guys! I am so sorry I haven't been posting! I honestly have not gotten around to doing another manicure after my last and I haven't been doing my nails enough to have a collection of manicures to use as back-up posts. So, I decided to do something a bit different. I will tell you a bit about me.  (If you want to see a manicure, just skip over reading this post!)  On the side of my blog there is a little "about me" link that brings you to my Google page. That doesn't have much information on it, though.  So, here is a bit about me:

My name is Maggie.  I was born in New York and I am going to be 20 years old next month.  I live at home with my dad, my mom, and my younger sister.  I was home schooled from 6th-12th grade and now I am a college student majoring in childhood education.  I had changed my major, so I am taking three full years to get my associate's degree.  I have six more classes until I can graduate with an associate's!  I plan on going on to get my bachelor's degree in childhood education and then, eventually, my master's degree in special education.

When I was younger I was not into nail art at all.  I never even painted my nails.  It has just been within the past few years that I have enjoyed nail art.  Cutepolish (on Youtube) was who originally inspired me to do more with my nails.  Then I found The Nailasaurus.  She is an AMAZING nail artist and she got me in to doing more with studs and stamping and striping and glitter.  

The things I enjoy doing most are cross stitching (though it takes me years to finish projects), doing my nails, hanging out with my younger sister and my best friend, reading (though I have to say I read a lot more before starting college.  One of my all time favorite books is Extremely Loud and Incredibly Close by Jonathan Safran Foer), exercising with Blogilates (I follow her workout calendar), listening to music on my iPod (I like a little of everything, except for rap and country), and watching fun TV shows and movies with my family.  I got into Star Trek The Original Series when I was 16 and now I love all Star Trek (except for The Original Series movies, which I only watch for a good laugh, and "Enterprise," which I can't stand.)  I watched all of "Voyager" by myself and now I am rewatching it with my mom.  I love Captain Janeway!  

The people whom I spend the most time with are my sister, my best friend (whom my sister and I have been best friends with since we were toddlers when we met at our church), my mom, and my dad.

I have always been an animal lover and have had many pets over the years.  I have had guinea pigs (my profile picture is of King Tut, who, sadly, isn't around any more), hamsters, and a gerbil.  My family has a ball python named Socci, who could be 30 years old at this point.  We also have an adorable Australian Shepherd-Black Lab mix named Digby, and a rabbit named Duffle.

This year I got my first tattoo!  I never thought I'd get one, but my best friend, my sister, and I all decided to get friendship tattoos!  We have always thought of ourselves as the Three Musketeers and have decided that I am Aramis, my sister is Porthos, and my friend is Athos.  So, my tattoo says "Un pour tous," which means "one for all" in French; my friend's says "Tous pour un," which means "all for one" in French; and my sister's is a fleur de lis, the symbol of the Musketeers.  I absolutely love my tattoo and I doubt I will ever get another one, though my sister and friend now have other tattoos, as well.

Tomorrow I am leaving for Florida for a week to visit my grandpa and step grandma!  I am super excited!  I have never been there before.  So, I won't be posting another manicure until after August 24th.  Sorry about that!  I will get back into doing manicures soon, hopefully!  

Here is a picture of me that was taken this past Easter at our church, where my sister and I met our best friend:


 I am the one on the left, my best friend is in the center, and my sister is on the right.